How to Install Drupal on Ubuntu 16.04 or 18.04
This post will guide you how to install Drupal on an Ubuntu Linux 16.04 or 18.04. How do I install the latest version of Drupal CMS on Ubuntu Linux system. and you will learn that how to use Apache as a web server, the latest PHP 7.2 and MySQL as a database server to setup Drupal CMS server.
- What is Drupal?
- Prerequistes
- Step1: Installing and Configuring MySQL Database
- Step2: Installing PHP
- Step3:Installing and Configuring Apache
- Step4: Downloading Drupal
- Step5: Installing Drupal

What is Drupal?
Drupal is a popular open source Content Management system, you can use this system to build your personal websites. It’s used to make many of the websites and applications you use every day. Drupal has great standard features, like easy content authoring, reliable performance, and excellent security. But what sets it apart is its flexibility; modularity is one of its core principles. Its tools help you build the versatile, structured content that dynamic web experiences need.
The Drupal project is open source software. Anyone can download, use, work on, and share it with others. It’s built on principles like collaboration, globalism, and innovation. It’s distributed under the terms of the GNU General Public License (GPL). There are no licensing fees, ever. Drupal will always be free.
Prerequistes
Before you get started with this post, you need to get a non-root user with sudo privileges set up.
you need to have a domain name poingting to your public IP for your system.
Before you begin, you need to update the package index and all installed packages to the latest versions on your Ubuntu system with the following commands:
$ sudo apt-get update && sudo apt-get upgrade && sudo apt-get autoremove
After updateing your system, you may be need to reboot the system.
Step1: Installing and Configuring MySQL Database
Now we can begin to install and configure MySQL database on your Ubuntu server. Firstly, you need to install the latest MySQL or MariaDB database in your system with the following command:
$ sudo apt install mysql-server mysql-client
After installing MySQL, you need to start and enable MySQL service with the following command:
$ sudo systemctl start mysql
$ sudo systemctl enable mysql
Once the installation is completed, you’d better to run mysq_secure_installation script to secure your MySQL or MariaDB installation by running the following command:
$ sudo mysql_secure_installation
Outputs:
Enter password for user root: TYPE CURRENT ROOT PASSWORD

VALIDATE PASSWORD PLUGIN can be used to test passwords
and improve security. It checks the strength of password
and allows the users to set only those passwords which are
secure enough. Would you like to setup VALIDATE PASSWORD plugin?

Press y|Y for Yes, any other key for No: y

There are three levels of password validation policy:

LOW Length >= 8
MEDIUM Length >= 8, numeric, mixed case, and special characters
STRONG Length >= 8, numeric, mixed case, special characters and dictionary file

Please enter 0 = LOW, 1 = MEDIUM and 2 = STRONG: 2
Using existing password for root.

Estimated strength of the password: 50
Change the password for root ? ((Press y|Y for Yes, any other key for No) : n

... skipping.
By default, a MySQL installation has an anonymous user,
allowing anyone to log into MySQL without having to have
a user account created for them. This is intended only for
testing, and to make the installation go a bit smoother.
You should remove them before moving into a production
environment.

Remove anonymous users? (Press y|Y for Yes, any other key for No) : y
Success.

Normally, root should only be allowed to connect from
'localhost'. This ensures that someone cannot guess at
the root password from the network.

Disallow root login remotely? (Press y|Y for Yes, any other key for No) : y
Success.

By default, MySQL comes with a database named 'test' that
anyone can access. This is also intended only for testing,
and should be removed before moving into a production
environment.

Remove test database and access to it? (Press y|Y for Yes, any other key for No) : y
- Dropping test database...
Success.

- Removing privileges on test database...
Success.

Reloading the privilege tables will ensure that all changes
made so far will take effect immediately.

Reload privilege tables now? (Press y|Y for Yes, any other key for No) : y
Success.

All done!
Once the Database installation is completed, and you need to create a database for your Drupal site, and create one mysql user.
Firstly, you need to log in to your MySQl shell by issue the following command:
$ sudo mysql -u root -p
After loggin in, you need to run the following SQL statement to create a database called drupal, and create a database user called drupaluser and also provide a password for this newly user. And you also need to grant the necessary permissions to this user account, just type the following SQL command:
sql> CREATE DATABASE drupal;
sql> CREATE USER drupaluser@localhost IDENTIFIED BY 'password';
sql> GRANT ALL ON drupal.* TO drupaluser@localhost;
sql> flush privileges;
sql> exit
Outputs:
mysql> CREATE DATABASE drupal;
Query OK, 1 row affected (0.00 sec)

mysql> CREATE USER drupaluser@localhost IDENTIFIED BY 'password';
Query OK, 0 rows affected (0.02 sec)

mysql> GRANT ALL ON drupal.* TO drupaluser@localhost;
Query OK, 0 rows affected (0.00 sec)

mysql> flush privileges;
Query OK, 0 rows affected (0.01 sec)
Step2: Installing PHP
you need to install PHP and other PHP related modules on your Ubuntu server, and the default version is PHP 7.2 in Ubuntu 18.04. to install PHP and other required PHP modules, just run the following command:
$ sudo apt install php7.2-cli php7.2-fpm php7.2-mysql php7.2-json php7.2-opcache php7.2-mbstring php7.2-xml php7.2-gd php7.2-curl
Step3: Installing and Configuring Apache
Now you can begin to install the Apache package with the following command:
$ sudo apt-get install apache2 libapache2-mod-php
Outputs:
devops@devops:~$ sudo apt-get install apache2 libapache2-mod-php
[sudo] password for devops:
Reading package lists... Done
Building dependency tree
Reading state information... Done
The following packages were automatically installed and are no longer required:
linux-headers-4.18.0-22 linux-headers-4.18.0-22-generic
linux-image-4.18.0-22-generic linux-modules-4.18.0-22-generic
linux-modules-extra-4.18.0-22-generic
Use 'sudo apt autoremove' to remove them.
The following additional packages will be installed:
apache2-bin apache2-data apache2-utils
Suggested packages:
apache2-doc apache2-suexec-pristine | apache2-suexec-custom
The following NEW packages will be installed:
libapache2-mod-php
The following packages will be upgraded:
apache2 apache2-bin apache2-data apache2-utils
4 upgraded, 1 newly installed, 0 to remove and 56 not upgraded.
Need to get 1,413 kB of archives.
After this operation, 16.4 kB of additional disk space will be used.
Do you want to continue? [Y/n]
…..

Setting up libapache2-mod-php (1:7.2+60ubuntu1) ...
Processing triggers for ureadahead (0.100.0-21) ...
Setting up apache2-utils (2.4.29-1ubuntu4.7) ...
Setting up apache2-bin (2.4.29-1ubuntu4.7) ...
Setting up apache2-data (2.4.29-1ubuntu4.7) ...
Processing triggers for systemd (237-3ubuntu10.23) ...
Processing triggers for man-db (2.8.3-2ubuntu0.1) ...
Setting up apache2 (2.4.29-1ubuntu4.7) ...
Once Apache package is installed on your system, you need to create a basic configuration file for Apache, and it will set DocumentRoot variable to specify the location of your website files and set ServerName variable to specify what you domain name is. And you can create it by copying a default config file, and then modify it. Just do the following steps:
1# Run the following command to copy the default config file to use it as a template.
$ sudo cp /etc/apache2/sites-available/000-default.conf /etc/apache2/sites-available/mytest.com.conf
2# edit the configuration file mytest.com.conf with vim text editor, and uncomment the ServerName line, and replace example.com with you domain name, and then update the remain lines as below:
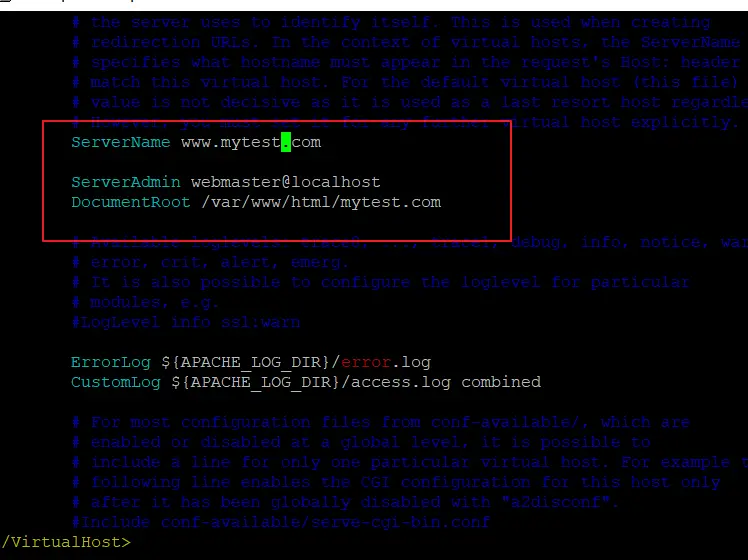
$ sudo vim /etc/apache2/sites-available/mytest.com.conf
ServerName mytest.com
ServerAdmin test@mytest.com
Documentroot /var/www/html/mytest.com

<Directory /var/www/html/mytest.com>
    AllowOverride All
</Directory>
3# you need to create the directory to store your website files with the following mkdir command:
$ sudo mkdir /var/www/html/mytest.com
4# you need to disable the default configuration file and enable the newly created one, mytest.com.conf, run the below command:
$ sudo a2dissite 000-default.conf
$ sudo a2ensite mytest.com.conf
Outputs:
devops@devops:~$ sudo a2dissite 000-default.conf
Site 000-default disabled.
To activate the new configuration, you need to run:
systemctl reload apache2

devops@devops:~$ sudo a2ensite mytest.com.conf
Enabling site mytest.com.
To activate the new configuration, you need to run:
systemctl reload apache2
5# you also need to enable the mod_rewrite Apache module for PrestaShop with the following command:
$ sudo a2enmod rewrite
6# need to restart Apache service with the following command:
$ sudo systemctl restart apache2.service
Step4: Downloading Drupal
Now you can download the latest version of Drupal package (8.7.5) from its official website. You’d better download the package on the /var/www/html/mytest.com directory with wget command:
$ cd /var/www/html/mytest.com
$ wget https://ftp.drupal.org/files/projects/drupal-8.7.5.tar.gz
outputs:
root@devops:/var/www/html/mytest.com# wget https://ftp.drupal.org/files/projects/drupal-8.7.5.tar.gz
--2019-07-24 05:18:16-- https://ftp.drupal.org/files/projects/drupal-8.7.5.tar.gz
Resolving ftp.drupal.org (ftp.drupal.org)... 151.101.110.217
Connecting to ftp.drupal.org (ftp.drupal.org)|151.101.110.217|:443... connected.
HTTP request sent, awaiting response... 200 OK
Length: 17843250 (17M) [application/octet-stream]
Saving to: ‘drupal-8.7.5.tar.gz’

drupal-8.7.5.tar.gz 100%[=================================================>] 17.02M 221KB/s in 69s

2019-07-24 05:19:26 (252 KB/s) - ‘drupal-8.7.5.tar.gz’ saved [17843250/17843250]
When the download is complete, you need to extract the Drupal archive file to your current directory, run:
$ tar -zxvf drupal-8.7.5.tar.gz
then you need to move Drupal content to apache default root directory /var/www/html/mytest.com directory with the following command:
$ sudo mv drupal-8.7.5/* /var/www/html/mytest.com/
Step5: Installing Drupal
Before you install Drupal, you still need to assign the right directory ownership for /var/www/html/mytest.com directory, so that the Apache web server can have full access to your website’s files and directories, issue the following command:
$ sudo chown www-data: /var/www/html/mytest.com/
$ sudo chmod -R 755 /var/www/html/mytest.com/
Then you can begin to install Drupalthrough the web interface, you just need to open your browser, and type your domain name or IP address, you should get a screen similar to the below screenshot:
