How to Install and Configure the Apache Web Server on CentOS7 or RHEL 8
This post will guide you how to install and configure the Apache Web Server on your CentOS 7 or RHEL 8 Linux server. How do I Configure Apache Http server with Vitural Hosts on CentOS 7 Linux.
- What is Apache Http Server?
- Install Apache Http Server
- Configure Apache Http Server
- Checking Apache Http Server
- Apache Http Server Configuration Files
- Creating Your Own Website (setting Up Virtual Hosts)
What is Apache Http Server?
Apache Http Server is the most popular web server in the word. It can provide many powerful features including dynamically loadable modules, and extensive integration with other software on your CentOS system.
The Apache HTTP Server is an open-source HTTP server for modern operating systems including UNIX, Microsoft Windows, Mac OS/X and Netware. The goal of this project is to provide a secure, efficient and extensible server that provides HTTP services observing the current HTTP standards. Apache has been the most popular web server on the Internet since April of 1996.

Install Apache Http Server
Before installing the Apache Http server package, you need to make sure that you are logged in as a use with sudo privileges so that you can install packages with the default yum repository.
Apache package is available in the default CentOS yum repository. So you just need to use yum install command to install it. And the Apache package or service is called httpd on CentOS or RHEL Linux. Type the following command to install the Apache or HTTPD package:
$ sudo yum install httpd
Outputs:
[root@devops ~]# yum install httpd
Loaded plugins: fastestmirror
Loading mirror speeds from cached hostfile
* base: mirrors.aliyun.com
* epel: mirrors.aliyun.com
* extras: mirrors.aliyun.com
* updates: mirrors.aliyun.com
Resolving Dependencies
--> Running transaction check
---> Package httpd.x86_64 0:2.4.6-88.el7.centos will be installed
--> Processing Dependency: httpd-tools = 2.4.6-88.el7.centos for package: httpd-2.4.6-88.el7.centos.x86_64
--> Processing Dependency: /etc/mime.types for package: httpd-2.4.6-88.el7.centos.x86_64
--> Running transaction check
---> Package httpd-tools.x86_64 0:2.4.6-88.el7.centos will be installed
---> Package mailcap.noarch 0:2.1.41-2.el7 will be installed
--> Finished Dependency Resolution

Dependencies Resolved

==============================================================================================================================================================
Package Arch Version Repository Size
==============================================================================================================================================================
Installing:
httpd x86_64 2.4.6-88.el7.centos base 2.7 M
Installing for dependencies:
httpd-tools x86_64 2.4.6-88.el7.centos base 90 k
mailcap noarch 2.1.41-2.el7 base 31 k

Transaction Summary
==============================================================================================================================================================
Install 1 Package (+2 Dependent packages)

Total download size: 2.8 M
Installed size: 9.6 M
Is this ok [y/d/N]:y

Downloading packages:
(1/3): httpd-tools-2.4.6-88.el7.centos.x86_64.rpm | 90 kB 00:00:00
(2/3): mailcap-2.1.41-2.el7.noarch.rpm | 31 kB 00:00:00
(3/3): httpd-2.4.6-88.el7.centos.x86_64.rpm | 2.7 MB 00:00:00
--------------------------------------------------------------------------------------------------------------------------------------------------------------
Total 2.8 MB/s | 2.8 MB 00:00:01
Running transaction check
Running transaction test
Transaction test succeeded
Running transaction
Installing : mailcap-2.1.41-2.el7.noarch 1/3
Installing : httpd-tools-2.4.6-88.el7.centos.x86_64 2/3
Installing : httpd-2.4.6-88.el7.centos.x86_64 3/3
Verifying : httpd-tools-2.4.6-88.el7.centos.x86_64 1/3
Verifying : mailcap-2.1.41-2.el7.noarch 2/3
Verifying : httpd-2.4.6-88.el7.centos.x86_64 3/3

Installed:
httpd.x86_64 0:2.4.6-88.el7.centos

Dependency Installed:
httpd-tools.x86_64 0:2.4.6-88.el7.centos mailcap.noarch 0:2.1.41-2.el7

Complete!
Note: you need to enter Y key to continue the installation process. And then the Apache package should be installed on your CentOS or RHEL Linux server.
Configure Apache Http Server
As CentOS 7’s built-in firewall is set to block web traffic by default. So you still need to open HTTP and HTTPS ports, 80 and 443 so that you can access your web server via a web browser on your CentOS system. Type the following commands to allow web traffic:
$ sudo firewall-cmd --add-service=http --permanent
$ sudo firewall-cmd --add-service=https –permanent
$ sudo systemctl restart firewalld
Outputs:
[root@devops ~]# sudo firewall-cmd --add-service=http --permanent
success
[root@devops ~]# sudo firewall-cmd --add-service=https --permanent
success
[root@devops ~]# sudo systemctl restart firewalld
[root@devops ~]#
Then you can verify that if the firewalld service is running,type:
$ sudo systemctl status firewalld
Outputs:
[root@devops ~]# sudo systemctl status firewalld
● firewalld.service - firewalld - dynamic firewall daemon
Loaded: loaded (/usr/lib/systemd/system/firewalld.service; enabled; vendor preset: enabled)
Active: active (running) since Wed 2019-04-17 09:12:23 EDT; 32s ago
Docs: man:firewalld(1)
Main PID: 5052 (firewalld)
Tasks: 2
Memory: 21.6M
CGroup: /system.slice/firewalld.service
└─5052 /usr/bin/python -Es /usr/sbin/firewalld --nofork --nopid
Checking Apache Http Server
After installed Apache package on your system, you still need to start the Apache service manually. As Apache does not start automatically when the Apache installation completes. Type the following command to start Apache service:
$ sudo systemctl start httpd.service
$ sudo systemctl enable httpd.service
Then you can verify that the Apache service if it is running with the following command:
$ sudo systemctl status httpd.service
Outputs:
[root@devops ~]# systemctl status httpd
● httpd.service - The Apache HTTP Server
Loaded: loaded (/usr/lib/systemd/system/httpd.service; disabled; vendor preset: disabled)
Active: inactive (dead)
Docs: man:httpd(8)
man:apachectl(8)

[root@devops ~]# systemctl start httpd
[root@devops ~]# systemctl status httpd.service
● httpd.service - The Apache HTTP Server
Loaded: loaded (/usr/lib/systemd/system/httpd.service; disabled; vendor preset: disabled)
Active: active (running) since Wed 2019-04-17 08:59:42 EDT; 7s ago
Docs: man:httpd(8)
man:apachectl(8)
Main PID: 4935 (httpd)
Status: "Processing requests..."
Tasks: 6
Memory: 3.2M
CGroup: /system.slice/httpd.service
├─4935 /usr/sbin/httpd -DFOREGROUND
├─4936 /usr/sbin/httpd -DFOREGROUND
├─4937 /usr/sbin/httpd -DFOREGROUND
├─4938 /usr/sbin/httpd -DFOREGROUND
├─4939 /usr/sbin/httpd -DFOREGROUND
└─4940 /usr/sbin/httpd -DFOREGROUND

Apr 17 08:59:42 devops systemd[1]: Starting The Apache HTTP Server...
Apr 17 08:59:42 devops httpd[4935]: AH00557: httpd: apr_sockaddr_info_get() failed for devops
Apr 17 08:59:42 devops httpd[4935]: AH00558: httpd: Could not reliably determine the server's full...sage
Apr 17 08:59:42 devops systemd[1]: Started The Apache HTTP Server.
Hint: Some lines were ellipsized, use -l to show in full.

[root@devops ~]# systemctl enable httpd.service
Created symlink from /etc/systemd/system/multi-user.target.wants/httpd.service to /usr/lib/systemd/system/httpd.service.
You can see that the current status of Apache service is active (running), it indicates that the service has started successfully.
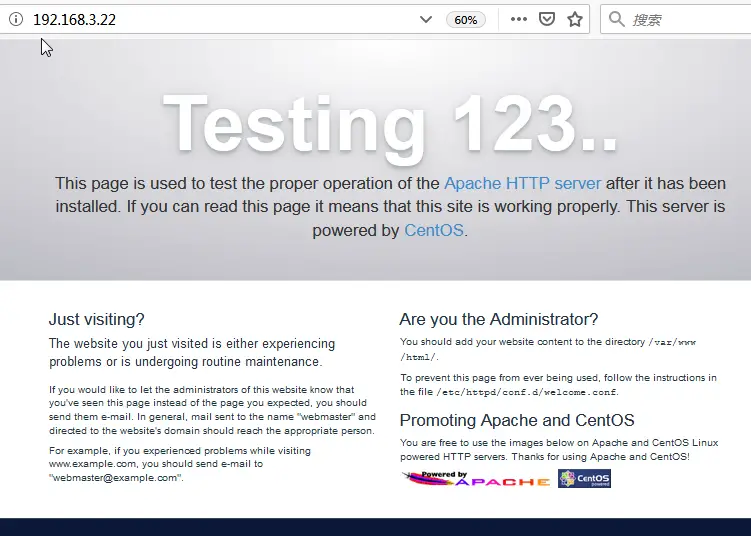
Then you can try to verify your Apache HTTP Server if it works properly. And you need to open your web browser to access the default Apache landing page to confirm that the installed Apache package is running. Type your server IP address with http protocol in your Firefox browser:
http://server_ip_address
You should see the default CentOS Apache web page, like as below:
If you want to stop the Apache service, Type the following command:
$ sudo systemctl stop httpd
If you want to restart the Apache service, type the following command:
$ sudo systemctl restart httpd
If you want to reload the Apache service, type:
$ sudo systemctl reload httpd
If you want to start the Apache service automatically at system boot, type:
$ sudo systemctl enable httpd
Apache Http Server Configuration Files
/etc/httpd/: All apache configuration files are stored in this directory.
/etc/httpd/httpd.conf: The main Apache configuration file in CentOS or RHEL.
/etc/httpd/conf.d/: All Virtual Hosts configuration files are stored in this directory.
/etc/httpd/conf.modules.d/: contains configuration files to both load modules and configure them.
/var/log/httpd/access_log and /var/log/httpd/error_log: Apache log files.
Creating Your Own Website (setting Up Virtual Hosts)
To set up a virtual host on your Apache HTTP Server, just do the following steps:
#1 you can create a virtual host configurations under the /etc/httpd/conf.d/ directory. For example, you want to create a website called osetc.com, you can add the following lines into your vhost.conf.
$ sudo vim /etc/httpd/conf.d/vhost.conf
NameVirtualHost *:80

<VirtualHost *:80>
ServerAdmin webmaster@osetc.com
ServerName osetc.com
ServerAlias www.osetc.com
DocumentRoot /var/www/html/osetc.com/public_html/
ErrorLog /var/www/html/osetc.com/logs/error.log
CustomLog /var/www/html/osetc.com/logs/access.log combined
</VirtualHost>
#2 if you want to set up another website, you just need to add the above lines into the VirtualHost block and modify its values for each additional virtual host.
Note: when new Http requests come in from the internet, Apache will check which VirtualHost block matches the requested url from your virtual host configuration file.
#3 create the directories you specified in virtual host file.
$ sudo mkdir –p /var/www/html/osetc.com/{public_html, logs}
#4 you need to restart the Apache service for above changes to take effect, type the following command:
$ sudo systemctl retart httpd.service
Your virtual host is configured and you are now ready to host websites.
Conclusion
You should know that how to install and configure Apache Http Server on CentOS Linux 7 or RHEL Linux 8. And you can start to deploy your applications or website.