How to Install and Configure Joomla on Ubuntu 16.04 or 18.04
This post will guide you how to install and configure Joomla to setup your own Content Management System on Ubuntu 16.04 or 18.04 or Debian Linux. How to setup Joomla system with Apache as a web server in your Ubuntu Linux.
- What is Joomla?
- Step1: update your Ubuntu server
- Step2: Installing MySQL or Mariadb Database
- Step3: Creating Database For Your Joomla System
- Step4:Installing PHP
- Step5:Installing and Configuring Apache Server or Httpd
- Step6: Downloading Joomla
- Step7: Configuring Apache2
- Step8: Configuring Joomla
- Step9: Using Joomla

What is Joomla?
Joomla is a free and open source content management system for publishing web content. And it developed by open source matters, Inc. it is developed by PHP language and can be used to built on a model-view-controller web application framework. And this software is easy to maintain. And it is one of the most popular content management system (CMS). It might be the second most popular CMS software behind WordPress. So far, it powers about 3 million websites on the internet.
Joomla has thousands of good features , so you can also use Joomla CMS software to build your own site or your eCommerce store or your personal blog.
Before installing Joomla CMS system, you need to have a non-root user with sudo privileges. You also need to install MySQL or Mariadb database to store your website data, and install PHP package to translate your PHP code, and also need to install an Apache Http server for your website. Here are the steps to install Joomla CMS:
Step1: update your Ubuntu server
You need to connect your Ubuntu server via SSH as a user with root privilege. Use the following command:
$ ssh devops@ipaddress
And replace ipaddress as your actual server IP address, then you need to input username and password to login it.
Once logged in your Ubuntu system, you need to update your default Ubuntu APT index to the latest version. And then upgrade all packages, issue the following command:
$ sudo apt update
$ sudo apt upgrade
Step2: Installing MySQL or Mariadb Database
Each web site have a database to store user data. And normally, you can install a open source database, such as: MySQL or Mariadb. If you want to install MySQL Database in your server, just run the following command:
$ sudo apt install mysql-server
Outputs:
root@devops-VirtualBox:~# sudo apt install mysql-server
Reading package lists... Done
Building dependency tree
Reading state information... Done
The following package was automatically installed and is no longer required:
libllvm7
Use 'sudo apt autoremove' to remove it.
The following additional packages will be installed:
libaio1 libevent-core-2.1-6 libhtml-template-perl mysql-client-5.7 mysql-client-core-5.7 mysql-common
mysql-server-5.7 mysql-server-core-5.7
Suggested packages:
libipc-sharedcache-perl mailx tinyca
The following NEW packages will be installed:
libaio1 libevent-core-2.1-6 libhtml-template-perl mysql-client-5.7 mysql-client-core-5.7 mysql-common mysql-server
mysql-server-5.7 mysql-server-core-5.7
0 upgraded, 9 newly installed, 0 to remove and 0 not upgraded.
Need to get 20.5 MB of archives.
After this operation, 160 MB of additional disk space will be used.
Do you want to continue? [Y/n]
……

Setting up mysql-server (5.7.26-0ubuntu0.18.04.1) ...
Processing triggers for libc-bin (2.27-3ubuntu1) ...
Processing triggers for ureadahead (0.100.0-21) ...
Processing triggers for systemd (237-3ubuntu10.22) ...
root@devops-VirtualBox:~#
Note: you need to press Y key to continue the installation of MySQL.
Or
If you want to install a MariaDB database server is also a good choice. To install it by run the following command:
$ sudo apt install mariadb-server mariadb-client
Outputs:
root@devops-VirtualBox:~# sudo apt install mariadb-server mariadb-client
Reading package lists... Done
Building dependency tree
Reading state information... Done
The following package was automatically installed and is no longer required:
libllvm7
Use 'sudo apt autoremove' to remove it.
The following additional packages will be installed:
galera-3 gawk libaio1 libconfig-inifiles-perl libdbd-mysql-perl libdbi-perl libhtml-template-perl libjemalloc1
libmysqlclient20 libreadline5 libsigsegv2 libterm-readkey-perl mariadb-client-10.1 mariadb-client-core-10.1
mariadb-common mariadb-server-10.1 mariadb-server-core-10.1 mysql-common socat
Suggested packages:
gawk-doc libmldbm-perl libnet-daemon-perl libsql-statement-perl libipc-sharedcache-perl mailx mariadb-test tinyca
The following NEW packages will be installed:
galera-3 gawk libaio1 libconfig-inifiles-perl libdbd-mysql-perl libdbi-perl libhtml-template-perl libjemalloc1
libmysqlclient20 libreadline5 libsigsegv2 libterm-readkey-perl mariadb-client mariadb-client-10.1
mariadb-client-core-10.1 mariadb-common mariadb-server mariadb-server-10.1 mariadb-server-core-10.1 mysql-common
socat
0 upgraded, 21 newly installed, 0 to remove and 0 not upgraded.
Need to get 24.1 MB of archives.
After this operation, 185 MB of additional disk space will be used.
Do you want to continue? [Y/n]Y
Note: you need to press Y key to continue the installation of MariaDB.
After installed, you need to start and enable MariaDB service or MySQL service so that it can startup when the system boots. Type the following command:
For MySQL:
$ sudo systemctl start mysql.service
$ sudo systemctl enable mysql.service
For Mariadb:
$ sudo systemctl start mariadb.service
$ sudo systemctl enable mariadb.service
By default, the root user for MySQL or Mariadb is blank. So you need to change your root password to secure your MySQL server or MariaDB server, just use the following command:
$ sudo mysql_secure_installation
This script will let you change root password, and remove anonymous users and disable remote root login, all steps can help to secure your database.
Outputs:
root@devops-VirtualBox:~# mysql_secure_installation

Securing the MySQL server deployment.

Connecting to MySQL using a blank password.

VALIDATE PASSWORD PLUGIN can be used to test passwords
and improve security. It checks the strength of password
and allows the users to set only those passwords which are
secure enough. Would you like to setup VALIDATE PASSWORD plugin?

Press y|Y for Yes, any other key for No: Y

There are three levels of password validation policy:

LOW Length >= 8
MEDIUM Length >= 8, numeric, mixed case, and special characters
STRONG Length >= 8, numeric, mixed case, special characters and dictionary file

Please enter 0 = LOW, 1 = MEDIUM and 2 = STRONG: 0
Please set the password for root here.

New password:=====>Type your new password

Re-enter new password:=====>Re-type your new password

Estimated strength of the password: 25
Do you wish to continue with the password provided?(Press y|Y for Yes, any other key for No) : Y
By default, a MySQL installation has an anonymous user,
allowing anyone to log into MySQL without having to have
a user account created for them. This is intended only for
testing, and to make the installation go a bit smoother.
You should remove them before moving into a production
environment.

Remove anonymous users? (Press y|Y for Yes, any other key for No) : Y
Success.

Normally, root should only be allowed to connect from
'localhost'. This ensures that someone cannot guess at
the root password from the network.

Disallow root login remotely? (Press y|Y for Yes, any other key for No) : Y
Success.

By default, MySQL comes with a database named 'test' that
anyone can access. This is also intended only for testing,
and should be removed before moving into a production
environment.

Remove test database and access to it? (Press y|Y for Yes, any other key for No) : Y
- Dropping test database...
Success.

- Removing privileges on test database...
Success.

Reloading the privilege tables will ensure that all changes
made so far will take effect immediately.

Reload privilege tables now? (Press y|Y for Yes, any other key for No) : y
Success.

All done!
Then you still need to restart MySQL or MariaDB server by running the following command:
$ sudo systemctl restart mariadb.service
Or
$ sudo systemctl restart mysql.service
Step3: Creating Database For Your Joomla System
After installed MySQL or MariaDB server on your Ubuntu Linux, you still need to create a database in your Database server, you need to connect to your MySQL or Mariadb server with the following command:
$ mysql -uroot -pdevops
Outputs:
root@devops-VirtualBox:~# mysql -uroot -pdevops
mysql: [Warning] Using a password on the command line interface can be insecure.
Welcome to the MySQL monitor. Commands end with ; or \g.
Your MySQL connection id is 5
Server version: 5.7.26-0ubuntu0.18.04.1 (Ubuntu)

Copyright (c) 2000, 2019, Oracle and/or its affiliates. All rights reserved.

Oracle is a registered trademark of Oracle Corporation and/or its
affiliates. Other names may be trademarks of their respective
owners.

Type 'help;' or '\h' for help. Type '\c' to clear the current input statement.

mysql>
Then you need to execute the following SQL commands:
create user 'joomlauser'@'localhost' identified by 'devops123';
create database joomla;
grant all privileges on joomla.* to 'joomlauser'@'localhost' identified by 'devops123';
flush privileges;
Outputs:
mysql> create user 'joomlauser'@'localhost' identified by 'devops123';
Query OK, 0 rows affected (0.00 sec)

mysql> create database joomla;
Query OK, 1 row affected (0.00 sec)

mysql> grant all privileges on joomla.* to 'joomlauser'@'localhost' identified by 'devops123';
Query OK, 0 rows affected, 1 warning (0.00 sec)

mysql> flush privileges;
Query OK, 0 rows affected (0.00 sec)

mysql> exit
Bye
Those above commands will create a new user called “joomlauser” and create a new database for Joomla called joomla. And then grant user “joomlauser” to the Joomla database. You can replace “joomlauser” and “devops123” username and password with your choice.
Step4:Installing PHP
You can install PHP 7.2 which is the default version of PHP package in Ubuntu 18.04 repo. So you can use apt command to install PHP package and all required PHP extensions with the following command using the default APT repositories:
$ sudo apt update
$ sudo apt install php7.2 php7.2-cli php7.2-mysql php7.2-json php7.2-opcache php7.2-mbstring php7.2-intl php7.2-xml php7.2-gd php7.2-zip php7.2-curl php7.2-xmlrpc php7.2-xmlrpc
Outputs:
root@devops-VirtualBox:~# sudo apt install php7.2 php7.2-cli php7.2-mysql php7.2-json php7.2-opcache php7.2-mbstring php7.2-intl php7.2-xml php7.2-gd php7.2-zip php7.2-curl php7.2-xmlrpc php7.2-xmlrpc
Reading package lists... Done
Building dependency tree
Reading state information... Done
The following package was automatically installed and is no longer required:
libllvm7
Use 'sudo apt autoremove' to remove it.
The following additional packages will be installed:
apache2 apache2-bin apache2-data apache2-utils libapache2-mod-php7.2 libapr1 libaprutil1 libaprutil1-dbd-sqlite3
libaprutil1-ldap libcurl4 liblua5.2-0 libxmlrpc-epi0 libzip4 php-common php7.2-common php7.2-readline
Suggested packages:
apache2-doc apache2-suexec-pristine | apache2-suexec-custom php-pear
The following NEW packages will be installed:
apache2 apache2-bin apache2-data apache2-utils libapache2-mod-php7.2 libapr1 libaprutil1 libaprutil1-dbd-sqlite3
libaprutil1-ldap libcurl4 liblua5.2-0 libxmlrpc-epi0 libzip4 php-common php7.2 php7.2-cli php7.2-common
php7.2-curl php7.2-gd php7.2-intl php7.2-json php7.2-mbstring php7.2-mysql php7.2-opcache php7.2-readline
php7.2-xml php7.2-xmlrpc php7.2-zip
0 upgraded, 28 newly installed, 0 to remove and 0 not upgraded.
Need to get 6,768 kB of archives.
After this operation, 28.4 MB of additional disk space will be used.
Do you want to continue? [Y/n] Y
……
Setting up php7.2 (7.2.17-0ubuntu0.18.04.1) ...
Processing triggers for libc-bin (2.27-3ubuntu1) ...
Processing triggers for ureadahead (0.100.0-21) ...
Processing triggers for systemd (237-3ubuntu10.22) ...
Processing triggers for ufw (0.36-0ubuntu0.18.04.1) ...
You need to press Y key and hit Enter key when prompted to confirm the installation.
After installed, you can check the PHP version installed on your system, type:
$ php -v
Outputs:
root@devops-VirtualBox:~# php -v
PHP 7.2.17-0ubuntu0.18.04.1 (cli) (built: Apr 18 2019 14:12:38) ( NTS )
Copyright (c) 1997-2018 The PHP Group
Zend Engine v3.2.0, Copyright (c) 1998-2018 Zend Technologies
with Zend OPcache v7.2.17-0ubuntu0.18.04.1, Copyright (c) 1999-2018, by Zend Technologies
Step5:Installing and Configuring Apache Server or Httpd
You need to install a web server for Joomla system, and you can choose the most popular web server called Apache2. To install Apache package on your Ubuntu Linux, just running the following commands:
$ sudo apt update
$ sudo apt install apache2
Outputs:


root@devops-VirtualBox:~# sudo apt install apache2
Reading package lists... Done
Building dependency tree
Reading state information... Done
apache2 is already the newest version (2.4.29-1ubuntu4.6).
apache2 set to manually installed.
The following package was automatically installed and is no longer required:
libllvm7
Use 'sudo apt autoremove' to remove it.
0 upgraded, 0 newly installed, 0 to remove and 0 not upgraded.
From the above outputs, you should see that the Apache package is installed by default.
And you still eed to enable Apache service to start it when system boot. Type:
$ sudo systemctl enable apache2
You can also check the status of your Apache service with the following command:
$ sudo systemctl status apache2
Outputs:
root@devops-VirtualBox:~# systemctl status apache2
● apache2.service - The Apache HTTP Server
Loaded: loaded (/lib/systemd/system/apache2.service; enabled; vendor preset: enabled)
Drop-In: /lib/systemd/system/apache2.service.d
└─apache2-systemd.conf
Active: active (running) since Tue 2019-06-04 08:30:59 EDT; 4min 43s ago
Main PID: 20959 (apache2)
Tasks: 6 (limit: 1109)
CGroup: /system.slice/apache2.service
├─20959 /usr/sbin/apache2 -k start
├─20963 /usr/sbin/apache2 -k start
├─20964 /usr/sbin/apache2 -k start
├─20965 /usr/sbin/apache2 -k start
├─20966 /usr/sbin/apache2 -k start
└─20967 /usr/sbin/apache2 -k start

Jun 04 08:30:59 devops-VirtualBox systemd[1]: Starting The Apache HTTP Server...
Jun 04 08:30:59 devops-VirtualBox apachectl[20955]: AH00558: apache2: Could not reliably determine the server's fully
Jun 04 08:30:59 devops-VirtualBox systemd[1]: Started The Apache HTTP Server.
Step6: Downloading Joomla
Now you can download Joomla package from the official site with the following wget command, type:
$ wget https://downloads.joomla.org/cms/joomla3/3-9-6/Joomla_3-9-6-Stable-Full_Package.tar.gz?format=gz
Then you need to extract the package, and create a Joomla directory in the Apache Document Root directory (/var/www/html), run the commands as below:
$ sudo mkdir -p /var/www/html/joomla
$ tar -zxvf Joomla_3-9-6-Stable-Full_Package.tar.gz\?format\=gz -C /var/www/html/joomla/
You still need to change the directory permission with chown or chmod command, type:
$ sudo chown -R www-data:www-data /var/www/html/joomla
$ sudo chmod -R 755 /var/www/html/joomla
Step7: Configuring Apache2
You need to create a new virtual Host configuration file for your joomla website, just create a new configuration file under /etc/apache2/sites-available directory with vi or vim text editor.
$ sudo vim /etc/apache2/sites-available/mytest.com.conf
Add the following lines into the file:
ServerAdmin admin@example.com
DocumentRoot /var/www/html/joomla/
ServerName example.com
ServerAlias www.example.com

ErrorLog ${APACHE_LOG_DIR}/error.log
CustomLog ${APACHE_LOG_DIR}/access.log combined

Options FollowSymlinks
AllowOverride All
Require all granted
Save and close the file.
After configuring the virtual configuration file, you still need to enable the virtual host that you have just created above. Just type the following command:
$ sudo a2ensite mytest.com.conf
you need to reload all the settings above, just restart Apache2 service by running the following command:
$ sudo systemctl restart apache2.service
Step8: Configuring Joomla
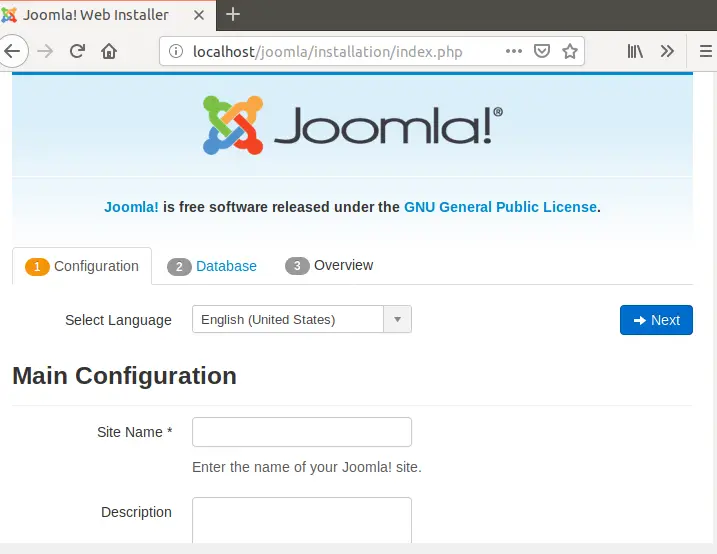
Now you can use your domain name to access your website to finish the last installation steps. You should see Joomla site setup wizard as below screenshot.
Then you need to enter your site name, description, email address and password that you want to create for the website administrator. Click Next button to proceed.
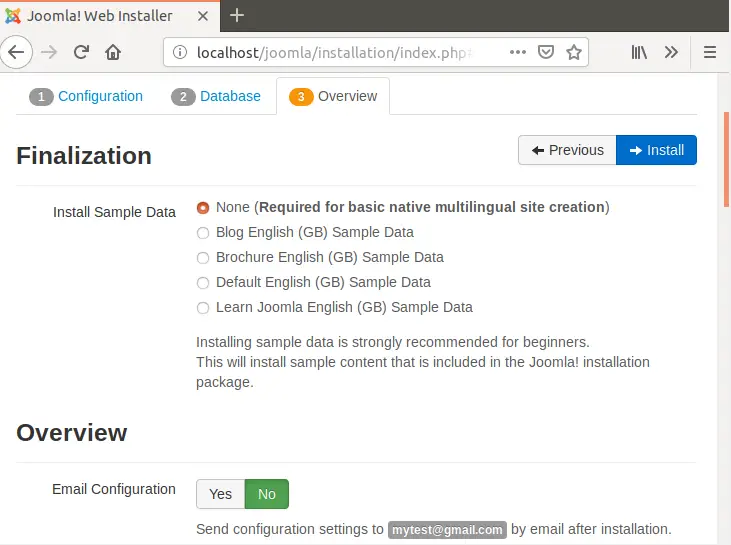
Then enter the database information (database name, username, password)that you created in above step. Click Next button.

Then click Install button.
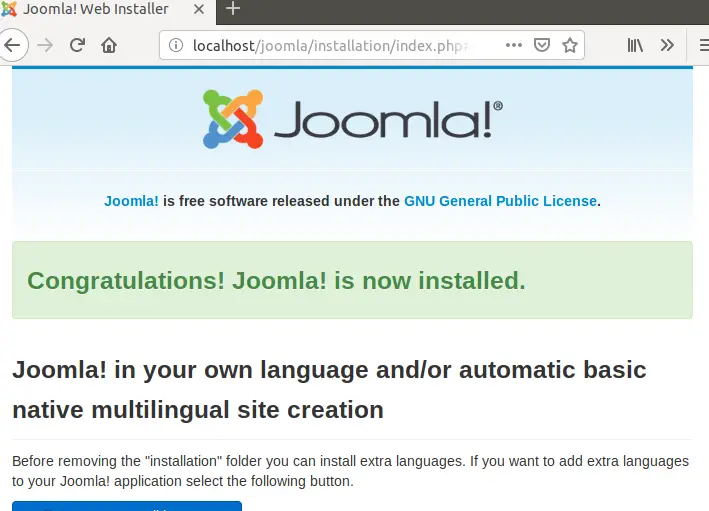
Then you will get a congratulations message. Joomla! is now installed on your ubuntu system.
Step9: Using Joomla
Let’s see the first page of your Joomla website.
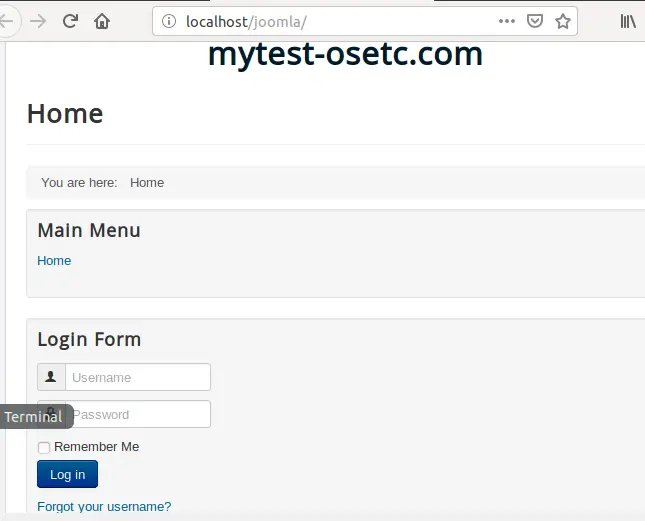
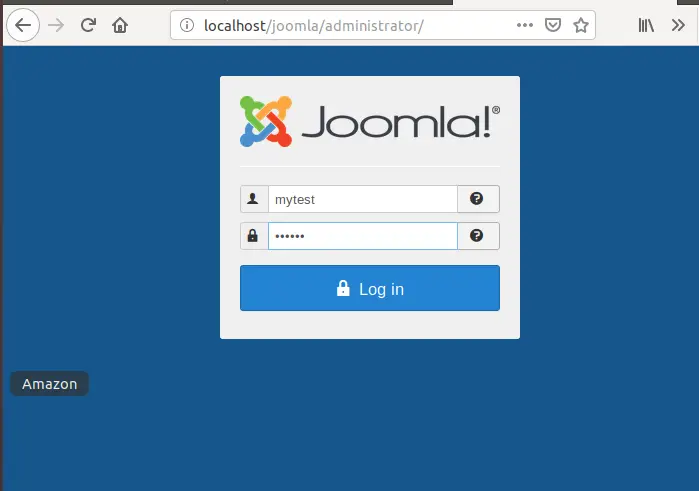
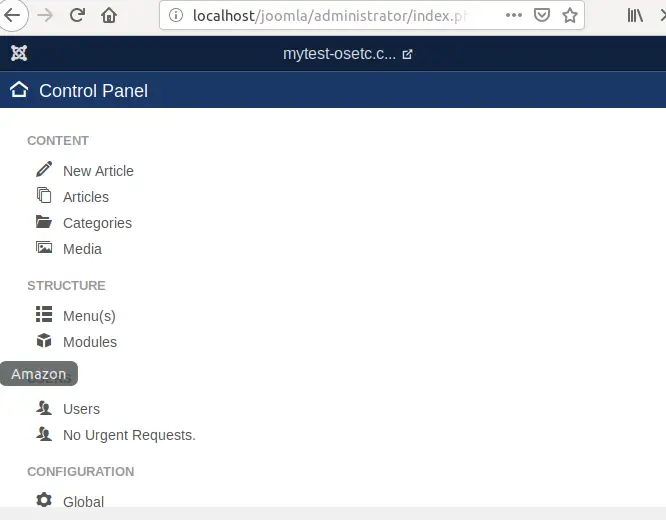
Or you can access http://mytest.com/administrator to access the Control panel of your site.
Conclusion
You should know that how to installed Joomla with Apache on your Ubuntu system. And you can now start to post content into your website. If you want to see more information about Joomla, you can directly go to Joomla’s official site.