Skip to content Skip to main navigation Skip to footer

python

Python中Django框架里如何使用django-tagging

Python中Django框架里django-tagging是如何来使用的呢?下面的内容将会通过具体的实例来演示Python中Django框架里django-tagging的使用方法及相关技巧:

django使用app机制来实现组件的重用,充分的利用已有的app可以极大的简化开发工作。目前django下的app虽然还不够丰富,却也还是有部分不错的。django-tagging就是一个不错的app。

现在tag的应用非常广泛,tag基本上成了各网站的必备项目之一,django-tagging就是一个提供tag功能的app。django-tagging提供的功能非常丰富,使用起来却十分简单。下面我就介绍一些常用的用法,让大家对该app有个基本的了解,更详细的介绍还是老老实实的去看django-tagging的使用说明吧:)。
tagging.fields.TagField

我们先定义一个数据库模型Widget,下面的范例都用Widget来进行说明

class Widget(models.Model):
  name = models.CharField(max_length=50)
  tags = TagField()
 

就如上面的代码,只要在数据库模型中增加tags字段就可以为该对象提供tag支持了。tags被映射为CharField,在为对象添加tag时为,英文逗号分割的字符串如:

Widget(name='hello', tags='test,hi,hello')
 

这样就为新建立的对象添加了test hi hello三个tag了。

获取某个tag下的所有对象的代码如下:

  #取出所有属于TAG hi的对象
  tag = get_object_or_404(Tag, name='hi')
  widgets = TaggedItem.objects.get_by_model(Widget, tag)
 

如要取出Widget用到的所有tag的代码为:

  tags = Widget.tags.all()


Python中Django框架里django-tagging就是这样,欢迎大家参考。。。。

wxPython中listbox用法介绍

wxPython中listbox是如何来使用的呢?下面的内容将会通过具体的实例来演示wxPython中listbox的使用方法及相关技巧:

本文实例讲述了wxPython中listbox用法。分享给大家供大家参考。具体如下:

# load a listbox with names, select a name and display in title
# experiments with wxPython by vegaseat 20mar2005
# Python v2.4 and wxPython v2.5
# If you have not already done so, install Python 2.4 first.
# I used python-2.4.1c2.msi (this is the self-extracting
# MS-Installer file) from http://www.python.org
# Then install wxPython2.5-win32-unicode-2.5.4.1-py24.exe
# from: http://prdownloads.sourceforge.net/wxpython/
# (if you don't get into unicode, download the ansi version)
# note: python-2.4.1c2.msi should soon be python-2.4.1.msi
import wx
def create(parent):
  return Frame1(parent)
# assign ID numbers
[wxID_FRAME1, wxID_FRAME1BUTTON1, wxID_FRAME1BUTTON2, wxID_FRAME1LISTBOX1,
] = [wx.NewId() for _init_ctrls in range(4)]
class Frame1(wx.Frame):
  def _init_ctrls(self, prnt):
    # BOA generated methods
    wx.Frame.__init__(self, id=wxID_FRAME1, name='', parent=prnt,
       pos=wx.Point(358, 184), size=wx.Size(299, 387),
       style=wx.DEFAULT_FRAME_STYLE, title=u'ListBox Test ...')
    self.SetClientSize(wx.Size(291, 347))
    self.SetBackgroundColour(wx.Colour(0, 128, 0))
    self.button1 = wx.Button(id=wxID_FRAME1BUTTON1, label=u'Load ListBox',
       name='button1', parent=self, pos=wx.Point(8, 8), size=wx.Size(176,
       28), style=0)
    self.button1.Bind(wx.EVT_BUTTON, self.OnButton1Button,
       id=wxID_FRAME1BUTTON1)
    self.listBox1 = wx.ListBox(choices=[], id=wxID_FRAME1LISTBOX1,
       name='listBox1', parent=self, pos=wx.Point(8, 48),
       size=wx.Size(184, 256), style=0)
    self.listBox1.SetBackgroundColour(wx.Colour(255, 255, 128))
    self.listBox1.Bind(wx.EVT_LISTBOX, self.OnListBox1Listbox,
       id=wxID_FRAME1LISTBOX1)
    self.button2 = wx.Button(id=wxID_FRAME1BUTTON2, label=u'Clear',
       name='button2', parent=self, pos=wx.Point(104, 312),
       size=wx.Size(87, 28), style=0)
    self.button2.Bind(wx.EVT_BUTTON, self.OnButton2Button,
       id=wxID_FRAME1BUTTON2)
  def __init__(self, parent):
    self._init_ctrls(parent)
  def OnButton1Button(self, event):
    '''
    click button to load the listbox with names
    '''
    self.listBox1.Append("Andreas")
    self.listBox1.Append("Erich")
    self.listBox1.Append("Udo")
    self.listBox1.Append("Jens")
    self.listBox1.Append("Bjorn")
    self.listBox1.Append("Heidrun")
    self.listBox1.Append("Ulla")
    self.listBox1.Append("Volger")
    self.listBox1.Append("Helmut")
    self.listBox1.Append("Freja")
    self.SetTitle("Select a name ...")
  def OnListBox1Listbox(self, event):
    '''
    click list item and display the selected string in frame's title
    '''
    selName = self.listBox1.GetStringSelection()
    self.SetTitle(selName)
  def OnButton2Button(self, event):
    '''
    click button to clear the listbox items
    '''
    self.listBox1.Clear()
#--------------- end of class Frame1 --------------------
# program entry point ...
if __name__ == '__main__':
  app = wx.PySimpleApp()
  wx.InitAllImageHandlers()
  frame = create(None)
  frame.Show()
  app.MainLoop()


wxPython中listbox就是这样,欢迎大家参考。。。。

python中处理图片常用技巧分析

下面的内容主要介绍了python中处理图片常用技巧,,欢迎大家参考:

本文实例讲述了python使用Image处理图片常用技巧。分享给大家供大家参考。具体分析如下:

使用python来处理图片是非常方便的,下面提供一小段python处理图片的代码,需要安装图像处理工具包PIL(Python Image Library)。

#coding=utf-8
import Image
import urllib2
import StringIO
import os
#改变图片大小
def resize_img(img_path):
  try:
    img = Image.open(img_path)
    (width,height) = img.size
    new_width = 200
    new_height = height * new_width / width
    out = img.resize((new_width,new_height),Image.ANTIALIAS)
    ext = os.path.splitext(img_path)[1]
    new_file_name = '%s%s' %('small',ext)
    out.save(new_file_name,quality=95)
  except Exception,e:
    print e
#改变图片类型
def change_img_type(img_path):
  try:
    img = Image.open(img_path)
    img.save('new_type.png')
  except Exception,e:
    print e
#处理远程图片
def handle_remote_img(img_url):
  try:
    request = urllib2.Request(img_url)
    img_data = urllib2.urlopen(request).read()
    img_buffer = StringIO.StringIO(img_data)
    img = Image.open(img_buffer)
    img.save('remote.jpg')
    (width,height) = img.size
    out = img.resize((200,height * 200 / width),Image.ANTIALIAS)
    out.save('remote_small.jpg')
  except Exception,e:
    print e
if __name__ == '__main__':
  img_path = 'test.jpg'
  resize_img(img_path)
  change_img_type(img_path)
  img_url = 'http://img.hb.aicdn.com/042f8a4a70239f724ff7b9fa0fc8edf18658f41022ada-WcItWE_fw554'
  handle_remote_img(img_url)
 

可能会遇到的问题

ImportError: No module named Image

解决办法:安装Python Imaging Library(PIL)

sudo easy_install PIL 

安装PIL出现:
— JPEG support not available

— ZLIB (PNG/ZIP) support not available

— FREETYPE2 support not available

操作jpeg图片和png图片出现:

IOError: decoder jpeg not available 和 IOError: encoder zip not available

解决办法:
(1) 删除已经安装的PIL

sudo rm -rf /usr/local/lib/python2.6/site-packages/PIL-1.1.7-py2.6-linux-x86_64.egg/ 

(2) 安装相关库

sudo apt-get install libjpeg8 libjpeg62-dev libfreetype6 libfreetype6-dev
sudo ln -s /usr/lib/x86_64-linux-gnu/libjpeg.so /usr/lib/
sudo ln -s /usr/lib/x86_64-linux-gnu/libfreetype.so /usr/lib/
sudo ln -s /usr/lib/x86_64-linux-gnu/libz.so /usr/lib/ 

(3) 重新安装PIL

sudo easy_install PIL 

终端出现:

— JPEG support available
— ZLIB (PNG/ZIP) support available
— FREETYPE2 support available

现在试试,已经ok了


python中处理图片常用技巧就是这样,欢迎大家参考。。。。

python实现图片变亮或变暗的方法分析

python实现图片变亮或变暗是如何来实现的呢?下面的内容将会通过具体的实例来演示python实现图片变亮或变暗的实现方法及相关技巧:

本文实例讲述了python实现图片变亮或者变暗的方法。分享给大家供大家参考。具体实现方法如下:

import Image
# open an image file (.jpg or.png) you have in the working folder
im1 = Image.open(“angelababy.jpg”)
# multiply each pixel by 0.9 (makes the image darker)
# works best with .jpg and .png files, darker < 1.0 < lighter # (.bmp and .gif files give goofy results) # note that lambda is akin to a one-line function im2 = im1.point(lambda p: p * 0.5) # brings up the modified image in a viewer, simply saves the image as # a bitmap to a temporary file and calls viewer associated with .bmp # make certain you have associated an image viewer with this file type im2.show() # save modified image to working folder as Audi2.jpg im2.save("angelababy2.jpg") [/code]

运行效果如下所示:

python实现图片变亮或变暗的方法分析


python实现图片变亮或变暗就是这样,欢迎大家参考。。。。

Python中运算符重载的使用分析

Python中运算符重载是如何来使用的呢?下面的内容将会通过具体的实例来演示Python中运算符重载的使用方法及相关技巧:

本文实例讲述了Python运算符重载用法。分享给大家供大家参考。具体如下:

在Python语言中提供了类似于C++的运算符重在功能:

一下为Python运算符重在调用的方法如下:

Method Overloads Call for
__init__ 构造函数 X=Class()
__del__ 析构函数 对象销毁
__add__ + X+Y,X+=Y
__or__ | X|Y,X|=Y
__repr__ 打印转换 print X,repr(X)
__str__ 打印转换 print X,str(X)
__call__ 调用函数 X()
__getattr_ 限制 X.undefine
__setattr__ 取值 X.any=value
__getitem__ 索引 X[key],
__len__ 长度 len(X)
__cmp__ 比较 X==Y,X

1. 减法重载

class Number:
  def __init__(self, start):
    self.data = start
  def __sub__(self, other): #minus method
    return Number(self.data - other)
number = Number(20)
y = number – 10 # invoke __sub__ method
class Number:
  def __init__(self, start):
    self.data = start
  def __sub__(self, other): #minus method
    return Number(self.data - other)
number = Number(20)
y = number – 10 # invoke __sub__ method
 

2. 迭代重载

class indexer:
  def __getitem__(self, index): #iter override
    return index ** 2
X = indexer()
X[2]
for i in range(5):
  print X[i]
class indexer:
  def __getitem__(self, index): #iter override
    return index ** 2
X = indexer()
X[2]
for i in range(5):
  print X[i]
 

3. 索引重载

class stepper:
  def __getitem__(self, i):
    return self.data[i]
X = stepper()
X.data = 'Spam'
X[1] #call __getitem__
for item in X: #call __getitem__
  print item
class stepper:
  def __getitem__(self, i):
    return self.data[i]
X = stepper()
X.data = 'Spam'
X[1] #call __getitem__
for item in X: #call __getitem__
   print item
 

4. getAttr/setAttr重载

class empty:
  def __getattr__(self,attrname):
    if attrname == 'age':
      return 40
    else:
      raise AttributeError,attrname
X = empty()
print X.age #call__getattr__
class accesscontrol:
  def __setattr__(self, attr, value):
    if attr == 'age':
      # Self.attrname = value loops!
      self.__dict__[attr] = value
    else:
      print attr
      raise AttributeError, attr + 'not allowed'
X = accesscontrol()
X.age = 40   #call __setattr__
X.name = 'wang' #raise exception
 

5. 打印重载

class adder:
  def __init__(self, value=0):
    self.data = value
  def __add__(self, other):
    self.data += other
class addrepr(adder):
  def __repr__(self):
    return 'addrepr(%s)' % self.data
x = addrepr(2) #run __init__
x + 1    #run __add__
print x   #run __repr__
class adder:
  def __init__(self, value=0):
    self.data = value
  def __add__(self, other):
    self.data += other
class addrepr(adder):
  def __repr__(self):
    return 'addrepr(%s)' % self.data
x = addrepr(2) #run __init__
x + 1    #run __add__
print x   #run __repr__
 

6. Call调用函数重载

class Prod:
  def __init__(self, value):
    self.value = value
  def __call__(self, other):
    return self.value * other
p = Prod(2) #call __init__
print p(1) #call __call__
print p(2)
class Prod:
  def __init__(self, value):
    self.value = value
  def __call__(self, other):
    return self.value * other
p = Prod(2) #call __init__
print p(1) #call __call__
print p(2)
 

7. 析构函数重载

class Life:
  def __init__(self, name='name'):
    print 'Hello', name
    self.name = name
  def __del__(self):
    print 'Goodby', self.name
brain = Life('Brain') #call __init__
brain = 'loretta'  # call __del__


Python中运算符重载就是这样,欢迎大家参考。。。。

Python获取当前运行目录与当前脚本目录的方法

Python获取当前运行目录与当前脚本目录是如何来实现的呢?下面的内容将会通过具体的实例来演示Python获取当前运行目录与当前脚本目录的实现方法及相关技巧:

本文实例讲述了Python获取运行目录与当前脚本目录的方法。分享给大家供大家参考。具体实现方法如下:

import os
import sys
#运行目录
CurrentPath = os.getcwd()
print CurrentPath
#当前脚本目录
print "##################################################"
print os.path
print sys.argv[0]
print os.path.split( os.path.realpath( sys.argv[0] ) )
print "##################################################"
ScriptPath = os.path.split( os.path.realpath( sys.argv[0] ) )[0]
print ScriptPath
 

运行结果如下:

C:pythondemo
##################################################
<module 'ntpath' from 'C:Python27libntpath.pyc'>
C:/pythondemo/1.py
('C:\pythondemo', '1.py')
##################################################
C:pythondemo


Python获取当前运行目录与当前脚本目录就是这样,欢迎大家参考。。。。

python获取目录下所有文件的方法介绍

python获取目录下所有文件是如何来实现的呢?下面的内容将会通过具体的实例来演示python获取目录下所有文件的实现方法及相关技巧:

本文实例讲述了python获取目录下所有文件的方法。分享给大家供大家参考。具体分析如下:

os.walk()

函数声明:walk(top,topdown=True,onerror=None)

1. 参数top表示需要遍历的目录树的路径

2. 参数topdown的默认值是”True”,表示首先返回目录树下的文件,然后在遍历目录树的子目录.Topdown的值为”False”时,则表示先遍历目录树的子目录,返回子目录下的文件,最后返回根目录下的文件

3. 参数onerror的默认值是”None”,表示忽略文件遍历时产生的错误.如果不为空,则提供一个自定义函数提示错误信息后继续遍历或抛出异常中止遍历

4. 该函数返回一个元组,该元组有3个元素,这3个元素分别表示每次遍历的路径名,目录列表和文件列表

def getListFiles(path):
  assert os.path.isdir(path), '%s not exist.' % path
  ret = []
  for root, dirs, files in os.walk(path):
    print '%s, %s, %s' % (root, dirs, files)
    for filespath in files:
      ret.append(os.path.join(root,filespath))
  return ret
print len(getListFiles('.'))


python获取目录下所有文件就是这样,欢迎大家参考。。。。

Python中django接入新浪微博OAuth的方法介绍

Python中django接入新浪微博OAuth是如何来实现的呢?下面的内容将会通过具体的实例来演示Python中django接入新浪微博OAuth的实现方法及相关技巧:

本文实例讲述了django接入新浪微博OAuth的方法。分享给大家供大家参考。具体分析如下:

最近将网站和新浪微博进行了整合,思路很简单,就是将页面内容和新浪微博联系起来,一个独立内容的页面对于一条微博,自然评论系统只需要使用微博的评论即可。 然后,用户需要发表评论的话,肯定要接入oauth,不可能让用户登录你的网站来发评论吧?没有谁会将自己的账号和密码告诉你的。 查看了新浪微博的授权机制,然后下载了python版的sdk,就可以在django上接入oauth了。

对于oauth很陌生的同学,请先查看OAUTH协议简介

其实流程很简单:

① getrequesttoken ->
② createauthurl ->
③ [user_login: 跳转到新浪登录页面,用户登陆后会跳转回来] ->
④ getaccesstoken ->
⑤ done!

在django上结合python版的sdk的具体实现代码,已经有很详细的注释了:

oauth_views.py文件如下:

#!/usr/bin/env python
# -*- coding: utf-8 -*-
"""
基于django的新浪微博oauth views
需要django的session支持
"""
from django.http import HttpResponseRedirect
from weibopy import OAuthHandler, oauth, WeibopError
consumer_key = '' # 设置你申请的appkey
consumer_secret = '' # 设置你申请的appkey对于的secret
class WebOAuthHandler(OAuthHandler):
  def get_authorization_url_with_callback(self, callback, signin_with_twitter=False):
    """Get the authorization URL to redirect the user"""
    try:
      # get the request token
      self.request_token = self._get_request_token()
      # build auth request and return as url
      if signin_with_twitter:
        url = self._get_oauth_url('authenticate')
      else:
        url = self._get_oauth_url('authorize')
      request = oauth.OAuthRequest.from_token_and_callback(
        token=self.request_token, callback=callback, http_url=url
      )
      return request.to_url()
    except Exception, e:
      raise WeibopError(e)
def _get_referer_url(request):
  referer_url = request.META.get('HTTP_REFERER', '/')
  host = request.META['HTTP_HOST']
  if referer_url.startswith('http') and host not in referer_url:
    referer_url = '/' # 避免外站直接跳到登录页而发生跳转错误
  return referer_url
def _oauth():
  """获取oauth认证类"""
  return WebOAuthHandler(consumer_key, consumer_secret)
def login(request):
  # 保存最初的登录url,以便认证成功后跳转回来
  back_to_url = _get_referer_url(request)
  request.session['login_back_to_url'] = back_to_url
  # 获取oauth认证url
  login_backurl = request.build_absolute_uri('/login_check')
  auth_client = _oauth()
  auth_url = auth_client.get_authorization_url_with_callback(login_backurl)
  # 保存request_token,用户登录后需要使用它来获取access_token
  request.session['oauth_request_token'] = auth_client.request_token
  # 跳转到登录页面
  return HttpResponseRedirect(auth_url)
def login_check(request):
  """用户成功登录授权后,会回调此方法,获取access_token,完成授权"""
  # http://mk2.com/&#63;oauth_token=c30fa6d693ae9c23dd0982dae6a1c5f9&oauth;_verifier=603896
  verifier = request.GET.get('oauth_verifier', None)
  auth_client = _oauth()
  # 设置之前保存在session的request_token
  request_token = request.session['oauth_request_token']
  del request.session['oauth_request_token']
  auth_client.set_request_token(request_token.key, request_token.secret)
  access_token = auth_client.get_access_token(verifier)
  # 保存access_token,以后访问只需使用access_token即可
  request.session['oauth_access_token'] = access_token
  # 跳转回最初登录前的页面
  back_to_url = request.session.get('login_back_to_url', '/')
  return HttpResponseRedirect(back_to_url)
def logout(request):
  """用户登出,直接删除access_token"""
  del request.session['oauth_access_token']
  back_to_url = _get_referer_url(request)
  return HttpResponseRedirect(back_to_url)


Python中django接入新浪微博OAuth就是这样,欢迎大家参考。。。。

Python中if __name__ == '__main__'语句用法

Python中if __name__ == ‘__main__’语句是如何来使用的呢?下面的内容将会通过具体的实例来演示Python中if __name__ == ‘__main__’语句的使用方法及相关技巧:

当你打开一个.py文件时,经常会在代码的最下面看到if __name__ == ‘__main__’:,现在就来介 绍一下它的作用.

模块是对象,并且所有的模块都有一个内置属性 __name__。一个模块的 __name__ 的值取决于您如何应用模块。如果 import 一个模块,那么模块__name__ 的值通常为模块文件名,不带路径或者文件扩展名。但是您也可以像一个标准的程序样直接运行模块,在这 种情况下, __name__ 的值将是一个特别缺省”__main__”。

///////////////////////////////////////////////////////////////////////////////////////////////////

在cmd 中直接运行.py文件,则__name__的值是’__main__’;

而在import 一个.py文件后,__name__的值就不是’__main__’了;

从而用if __name__ == ‘__main__’来判断是否是在直接运行该.py文件

如:

#Test.py 

class Test:

def __init(self):pass

def f(self):print ‘Hello, World!’

if __name__ == ‘__main__’:

Test().f()

#End

Python中if __name__ == ‘__main__’语句就是这样,欢迎大家参考。。。。

Python如何将阿拉伯数字转换化大写中文

Python将阿拉伯数字转换化大写中文是如何来实现的呢?下面的内容将会通过具体的实例来演示Python将阿拉伯数字转换化大写中文的实现方法及相关技巧:

周末在家,写了个小程序,用于将阿拉伯数字转换化大写中文。程序没经过任何优化,出没经过详细的测试,挂到网上,方便将来有需要的时候直接拿来用。

#!/usr/bin/python
#-*- encoding: utf-8 -*-
import types
class NotIntegerError(Exception):
pass
class OutOfRangeError(Exception):
pass
_MAPPING = (u’零’, u’一’, u’二’, u’三’, u’四’, u’五’, u’六’, u’七’, u’八’, u’九’, )
_P0 = (u”, u’十’, u’百’, u’千’, )
_S4, _S8, _S16 = 10 ** 4 , 10 ** 8, 10 ** 16
_MIN, _MAX = 0, 9999999999999999
def _to_chinese4(num):
”’转换[0, 10000)之间的阿拉伯数字
”’
assert(0 <= num and num < _S4) if num < 10: return _MAPPING[num] else: lst = [ ] while num >= 10:
lst.append(num % 10)
num = num / 10
lst.append(num)
c = len(lst) # 位数
result = u”
for idx, val in enumerate(lst):
if val != 0:
result += _P0[idx] + _MAPPING[val] if idx < c - 1 and lst[idx + 1] == 0: result += u'零' return result[::-1].replace(u'一十', u'十') def _to_chinese8(num): assert(num < _S8) to4 = _to_chinese4 if num < _S4: return to4(num) else: mod = _S4 high, low = num / mod, num % mod if low == 0: return to4(high) + u'万' else: if low < _S4 / 10: return to4(high) + u'万零' + to4(low) else: return to4(high) + u'万' + to4(low) def _to_chinese16(num): assert(num < _S16) to8 = _to_chinese8 mod = _S8 high, low = num / mod, num % mod if low == 0: return to8(high) + u'亿' else: if low < _S8 / 10: return to8(high) + u'亿零' + to8(low) else: return to8(high) + u'亿' + to8(low) def to_chinese(num): if type(num) != types.IntType and type(num) != types.LongType: raise NotIntegerError(u'%s is not a integer.' % num) if num < _MIN or num > _MAX:
raise OutOfRangeError(u’%d out of range[%d, %d)’ % (num, _MIN, _MAX))
if num < _S4: return _to_chinese4(num) elif num < _S8: return _to_chinese8(num) else: return _to_chinese16(num) if __name__ == '__main__': print to_chinese(9000) [/code]


Python将阿拉伯数字转换化大写中文就是这样,欢迎大家参考。。。。

Python纯真IP数据库文件分析

Python纯真IP数据库文件分析是如何来实现的呢?下面的内容将会通过具体的实例来演示Python纯真IP数据库文件分析的实现方法及相关技巧:

项目中有这样的需求,通过IP地址判断客户端是网通的还是电信的。从同事那拿了个纯文本的IP纯真数据库,用Python写了一个小程序,感觉挺好的。下面给出实现源码:

#!/usr/bin/env python
# -*- coding: utf-8 -*-
from bisect import bisect
_LIST1, _LIST2 = [], [] _INIT = False
ip2int = lambda ip_str: reduce(lambda a, b: (a << 8) + b, [int(i) for i in ip_str.split('.')]) def _init(): global _LIST, _INIT if not _INIT: for l in open('ipdata.txt', 'rb'): ip1, ip2 = l.split()[:2] addr = ' '.join(l.split()[2:]) ip1, ip2 = ip2int(ip1), ip2int(ip2) _LIST1.append(ip1) _LIST2.append((ip1, ip2, addr)) _INIT = True def ip_from(ip): _init() i = ip2int(ip) idx = bisect(_LIST1, i) assert(idx > 0)
if len(_LIST1) <= idx: return u'unknown ip address %s' % ip else: frm, to ,addr = _LIST2[idx - 1] if frm <= i <= to: return addr else: return u'unknown ip address %s' % ip if __name__ == '__main__': print ip_from('115.238.54.106') print ip_from('220.181.29.160') print ip_from('115.238.54.107') print ip_from('8.8.8.8') [/code]


Python纯真IP数据库文件分析就是这样,欢迎大家参考。。。。

python如何编写CGI脚本

Python编写CGI脚本是如何来实现的呢?下面的内容将会通过具体的实例来演示Python编写CGI脚本的实现方法及相关技巧:

你是否想使用Python语言创建一个网页,或者处理用户从web表单输入的数据?这些任务可以通过Python CGI(公用网关接口)脚本以及一个Apache web服务器实现。当用户请求一个指定URL或者和网页交互(比如点击””提交”按钮)的时候,CGI脚本就会被web服务器启用。CGI脚本调用执行完毕后,它的输出结果就会被web服务器用来创建显示给用户的网页。
配置Apache web服务器,让其能运行CGI脚本

在这个教程里,我们假设Apache web服务器已经安装好,并已运行。这篇教程使用的Apache web服务器(版本2.2.15,用于CentOS发行版6.5)运行在本地主机(127.0.0.1),并且监听80端口,如下面的Apache指令指定一样:

ServerName 127.0.0.1:80
    Listen 80  

下面举例中的HTML文件存放在web服务器上的/var/www/html目录下,并通过DocumentRoot指令指定(指定网页文件所在目录):

DocumentRoot "/var/www/html"  

现在尝试请求URL:http://localhost/page1.html

这将返回web服务器中下面文件的内容:

/var/www/html/page1.html  

为了启用CGI脚本,我们必须指定CGI脚本在web服务器上的位置,需要用到ScriptAlias指令:

ScriptAlias /cgi-bin/ "/var/www/cgi-bin/"  

以上指令表明CGI脚本保存在web服务器的/var/www/cgi-bin目录,请求URL里包含/cgi-bin/的将会搜索这个目录下的CGI脚本。

我们必须还要明确CGI脚本在/var/www/cgi-bin目录下有执行权限,还要指定CGI脚本的文件扩展名。使用下面的指令:

 <directory "/var/www/cgi-bin">
  Options +ExecCGI
  AddHandler cgi-script .py
 </directory>
 

下面访问URL:http://localhost/cgi-bin/myscript-1.py

这将会调用web服务器中下面所示脚本:

/var/www/cgi-bin/myscript-1.py  

创建一个CGI脚本

在创建一个Python CGI脚本之前,你需要确认你已经安装了Python(这通常是默认安装的,但是安装版本可能会有所不同)。本篇教程使用的脚本是使用Python版本2.6.6编写的。你可以通过下面任意一命令(-V和–version参数将显示所安装Python的版本号)检查Python的版本。

 $ python -V
 $ python --version
 

如果你的Python CGI脚本要用来处理用户输入的数据(从一个web输入表单),那么你将需要导入Python cgi模块。这个模块可以处理用户通过web输入表单输入的数据。你可以在你的脚本中通过下面的语句导入该脚本:

 import cgi
 

你也必须修改Python CGI脚本的执行权限,以防止web服务器不能调用。可以通过下面的命令增加执行权限:

 # chmod o+x myscript-1.py
 

Python CGI例子

涉及到Python CGI脚本的两个方案将会在下面讲述:

  • 使用Python脚本创建一个网页
  • 读取并显示用户输入的数据,并且在网页上显示结果

注意:Python cgi模块在方案2中是必需的,因为这涉及到用户从web表单输入数据。
例子1 :使用Python脚本创建一个网页

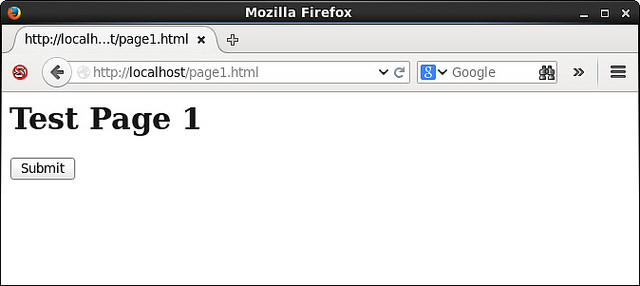
对于这个方案,我们将通过创建包含一个单一提交按钮的网页/var/www/html/page1.html开始。

 <html>
 <h1>Test Page 1</h1>
 <form name="input" action="/cgi-bin/myscript-1.py" method="get">
 <input type="submit" value="Submit">
 </form>
 </html>
 

当”提交”按钮被点击,/var/www/cgi-bin/myscript-1.py脚本将被调用(通过action参数指定)。通过设置方法参数为”get”来指定一个”GET”请求,服务器将会返回指定的网页。/var/www/html/page1.html在浏览器中的显示情况如下:

2015629110446275.jpg (640×286)

/var/www/cgi-bin/myscript-1.py的内容如下:

 #!/usr/bin/python
 print "Content-Type: text/html"
 print ""
 print "<html>"
 print "<h2>CGI Script Output</h2>"
 print "<p>This page was generated by a Python CGI script.</p>"
 print "</html>"
 

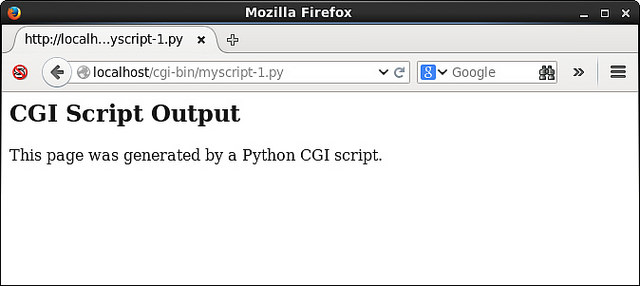
第一行声明表示这是使用 /usr/bin/python命令运行的Python脚本。”Content-Type: text/html”打印语句是必需的,这是为了让web服务器知道接受自CGI脚本的输出类型。其余的语句用来输出HTML格式的其余网页内容。

当”Submit”按钮点击,下面的网页将返回:

2015629111109379.jpg (640×286)

这个例子的要点是你可以决定哪些信息可以被CGI脚本返回。这可能包括日志文件的内容,当前登陆用户的列表,或者今天的日期。在你处理时拥有所有python库的可能性是无穷无尽的。
例子2:读取并显示用户输入的数据,并将结果显示在网页上

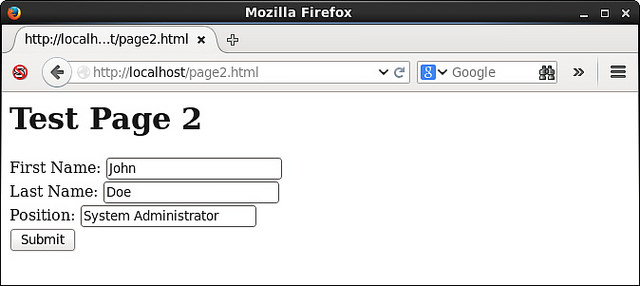
对于这个方案,我们将通过创建一个含有三个输入域和一个提交按钮的网页/var/www/html/page2.html开始。

 <html>
 <h1>Test Page 2</h1>
 <form name="input" action="/cgi-bin/myscript-2.py" method="get">
 First Name: <input type="text" name="firstName"><br />
 Last Name: <input type="text" name="lastName"><br />
 Position: <input type="text" name="position"><br />
 <input type="submit" value="Submit">
 </form>
 </html>
 

当”Submit”按钮点击,/var/www/cgi-bin/myscript-2.py脚本将被执行(通过action参数指定)。/var/www//html/page2.html显示在web浏览器中的图片如下所示(注意,三个输入域已经被填写好了):

2015629111252493.jpg (640×286)

/var/www/cgi-bin/myscript-2.py的内容如下:

 #!/usr/bin/python
 import cgi
 form = cgi.FieldStorage()
 print "Content-Type: text/html"
 print ""
 print "<html>"
 print "<h2>CGI Script Output</h2>"
 print "<p>"
 print "The user entered data are:<br />"
 print "<b>First Name:</b> " + form["firstName"].value + "<br />"
 print "<b>Last Name:</b> " + form["lastName"].value + "<br />"
 print "<b>Position:</b> " + form["position"].value + "<br />"
 print "</p>"
 print "</html>"
 

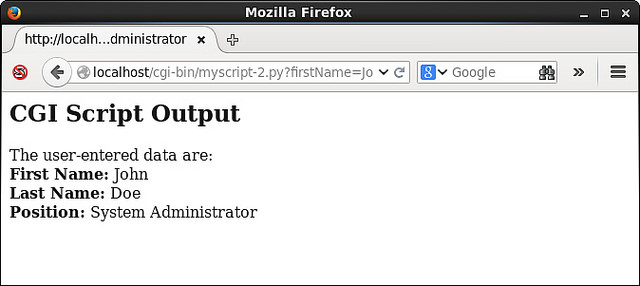
正如前面提到,import cgi语句用来确保能够处理用户通过web输入表单输入的数据。web输入表单被封装在一个表单对象中,叫做cgi.FieldStorage对象。一旦开始输出,”Content-Type: text/html”是必需的,因为web服务器需要知道接受自CGI脚本的输出格式。用户输入的数据在包含form[“firstName”].value,form[“lastName”].value,和 form[“position”].value的语句中可以得到。那些中括号中的名称和/var/www/html/page2.html文本输入域中定义的名称参数一致。

当网页上的”Submit”按钮被点击,下面的网页将被返回。

2015629111455279.jpg (640×286)

这个例子的要点就是你可以很容易地读取并显示用户在web表单上输入的数据。除了以字符串的方式处理数据,你也可以用Python将用户输入的数据转化为可用于数值计算的数字。


Python编写CGI脚本就是这样,欢迎大家参考。。。。

python链接Oracle数据库的方法详细实例介绍

python链接Oracle数据库是如何来实现的呢?下面的内容将会通过具体的实例来演示python链接Oracle数据库的实现方法及相关技巧:

本文实例讲述了python链接Oracle数据库的方法。分享给大家供大家参考。具体如下:

这里使用python链接Oracle数据库需要引用cx_Oracle库

#coding=UTF-8
  import cx_Oracle
  def hello():
    '''Hello cx_Oracle示例:
    1)打印数据库版本信息.
    2)查询表数据.'''
    conn = cx_Oracle.connect("obs61","obs61","tx8i.hp")
    cur = conn.cursor()
    try:
      print "Oracle Version:%s" % conn.version
      print "Table SUB_POLICY rows:"
      cur.execute('select * from wlan_future_event')
      for row in cur:
        print row
    finally:
      cur.close()
      conn.close()
  hello()


python链接Oracle数据库就是这样,欢迎大家参考。。。。

python中如何编写日志封装类

python中编写日志封装类是如何来实现的呢?下面的内容将会通过具体的实例来演示python中编写日志封装类的实现方法及相关技巧:

本文实例讲述了python实现写日志封装类。分享给大家供大家参考。具体如下:

# encoding:utf-8
import sys
import logging
import time
def writeLog(message):
  logger=logging.getLogger()
  filename = time.strftime('%Y-%m-%d',time.localtime(time.time()))
  handler=logging.FileHandler("./log/"+filename+"error")
  logger.addHandler(handler)
  logger.setLevel(logging.NOTSET)
  logger.info(message)
if __name__ == '__main__':
  writeLog("hello")
 

将这段代码保存为 TLog,调用的时候先import TLog,然后TLog.writelog(“jb51.net”)即可


python中编写日志封装类就是这样,欢迎大家参考。。。。

Python如何实现hangman游戏实例介绍

Python中hangman游戏是如何来实现的呢?下面的内容将会通过具体的实例来演示Python中hangman游戏的实现方法及相关技巧:

本文实例讲述了Python实现的简单hangman游戏。分享给大家供大家参考。具体如下:

#!/usr/bin/env python
import random
import cPickle
class Hangman(object):
  '''A simple hangman game that tries to improve your vocabulary a bit '''
  def __init__(self):
    # the variables used, this is not necessary
    self.dumpfile = ''    #the dictionary file
    self.dictionary = {}   #the pickled dict
    self.words = []     #list of words used
    self.secret_word = ''  #the 'key'
    self.length = 0     #length of the 'key'
    self.keys = []      #inputs that match the 'key'
    self.used_keys = []   #keys that are already used
    self.guess = ''     #player's guess
    self.mistakes = 0    #number of incorrect inputs
    return self.load_dict()
  #insert some random hints for the player
  def insert_random(self, length):
    randint = random.randint
    # 3 hints
    if length >= 7: hint = 3
    else: hint = 1
    for x in xrange(hint):
        a = randint(1, length - 1)
        self.keys[a-1] = self.secret_word[a-1]
  def test_input(self):
    #if the guessed letter matches
    if self.guess in self.secret_word:
      indexes = [i for i, item in enumerate(self.secret_word) if item == self.guess]
      for index in indexes:
        self.keys[index] = self.guess
        self.used_keys.append(self.guess)
        print "used letters ",set(self.used_keys),'\n'
    #if the guessed letter didn't match
    else:
      self.used_keys.append(self.guess)
      self.mistakes += 1
      print "used letters ",set(self.used_keys),'\n'
  # load the pickled word dictionary and unpickle them
  def load_dict(self):
    try :
      self.dumpfile = open("~/python/hangman/wordsdict.pkl", "r")
    except IOError:
      print "Couldn't find the file 'wordsdict.pkl'"
      quit()
    self.dictionary = cPickle.load(self.dumpfile)
    self.words = self.dictionary.keys()
    self.dumpfile.close()
    return self.prepare_word()
  #randomly choose a word for the challenge
  def prepare_word(self):
    self.secret_word = random.choice(self.words)
    #don't count trailing spaces
    self.length = len(self.secret_word.rstrip())
    self.keys = ['_' for x in xrange(self.length)]
    self.insert_random(self.length)
    return self.ask()
  #display the challenge
  def ask(self):
    print ' '.join(self.keys), ":", self.dictionary[self.secret_word]
    print
    return self.input_loop()
  #take input from the player
  def input_loop(self):
    #four self.mistakes are allowed
    chances = len(set(self.secret_word)) + 4
    while chances != 0 and self.mistakes < 5:
      try:
        self.guess = raw_input("> ")
      except EOFError:
        exit(1)
      self.test_input()
      print ' '.join(self.keys)
      if '_' not in self.keys:
        print 'well done!'
        break
      chances -= 1
    if self.mistakes > 4: print 'the word was', ''.join(self.secret_word).upper()
    return self.quit_message()
  def quit_message(self):
    print "\n"
    print "Press 'c' to continue, or any other key to quit the game. "
    print "You can always quit the game by pressing 'Ctrl+D'"
    try:
      command = raw_input('> ')
      if command == 'c': return self.__init__() #loopback
      else : exit(0)
    except EOFError: exit(1)
if __name__ == '__main__':
  game = Hangman()
  game.__init__()


Python中hangman游戏就是这样,欢迎大家参考。。。。

python矩阵乘法的实现方法

python矩阵乘法是如何来实现的呢?下面的内容将会通过具体的实例来演示python矩阵乘法的实现方法及相关技巧:

本文实例讲述了python实现矩阵乘法的方法。分享给大家供大家参考。具体实现方法如下:

def matrixMul(A, B):
  res = [[0] * len(B[0]) for i in range(len(A))]
  for i in range(len(A)):
    for j in range(len(B[0])):
      for k in range(len(B)):
        res[i][j] += A[i][k] * B[k][j]
  return res
def matrixMul2(A, B):
  return [[sum(a * b for a, b in zip(a, b)) for b in zip(*B)] for a in A]
a = [[1,2], [3,4], [5,6], [7,8]]
b = [[1,2,3,4], [5,6,7,8]]
print matrixMul(a,b)
print matrixMul(b,a)
print "-"*90
print matrixMul2(a,b)
print matrixMul2(b,a)
print "-"*90
from numpy import dot
print map(list,dot(a,b))
print map(list,dot(b,a))
#Out:
#[[11, 14, 17, 20], [23, 30, 37, 44], [35, 46, 57, 68], [47, 62, 77, 92]]
#[[50, 60], [114, 140]]
#------------------------------------------------------------------------
#[[11, 14, 17, 20], [23, 30, 37, 44], [35, 46, 57, 68], [47, 62, 77, 92]]
#[[50, 60], [114, 140]]
#------------------------------------------------------------------------
#[[11, 14, 17, 20], [23, 30, 37, 44], [35, 46, 57, 68], [47, 62, 77, 92]]
#[[50, 60], [114, 140]]


python矩阵乘法就是这样,欢迎大家参考。。。。

python搜索文件并进行内容替换的类的实现方法实例

python搜索文件并进行内容替换的类是如何来实现的呢?下面的内容将会通过具体的实例来演示python搜索文件并进行内容替换的类的实现方法及相关技巧:

本文实例讲述了python实现的用于搜索文件并进行内容替换的类。分享给大家供大家参考。具体实现方法如下:

#!/usr/bin/python -O
# coding: UTF-8
"""
-replace string in files (recursive)
-display the difference.
v0.2
 - search_string can be a re.compile() object -> use re.sub for replacing
v0.1
 - initial version
  Useable by a small "client" script, e.g.:
-------------------------------------------------------------------------------
#!/usr/bin/python -O
# coding: UTF-8
import sys, re
#sys.path.insert(0,"/path/to/git/repro/") # Please change path
from replace_in_files import SearchAndReplace
SearchAndReplace(
  search_path = "/to/the/files/",
  # e.g.: simple string replace:
  search_string = 'the old string',
  replace_string = 'the new string',
  # e.g.: Regular expression replacing (used re.sub)
  #search_string = re.compile('{% url (.*&#63;) %}'),
  #replace_string = "{% url '\g<1>' %}",
  search_only = True, # Display only the difference
  #search_only = False, # write the new content
  file_filter=("*.py",), # fnmatch-Filter
)
-------------------------------------------------------------------------------
:copyleft: 2009-2011 by Jens Diemer
"""
__author__ = "Jens Diemer"
__license__ = """GNU General Public License v3 or above -
 http://www.opensource.org/licenses/gpl-license.php"""
__url__ = "http://www.jensdiemer.de"
__version__ = "0.2"
import os, re, time, fnmatch, difflib
# FIXME: see http://stackoverflow.com/questions/4730121/cant-get-an-objects-class-name-in-python
RE_TYPE = type(re.compile(""))
class SearchAndReplace(object):
  def __init__(self, search_path, search_string, replace_string,
                    search_only=True, file_filter=("*.*",)):
    self.search_path = search_path
    self.search_string = search_string
    self.replace_string = replace_string
    self.search_only = search_only
    self.file_filter = file_filter
    assert isinstance(self.file_filter, (list, tuple))
    # FIXME: see http://stackoverflow.com/questions/4730121/cant-get-an-objects-class-name-in-python
    self.is_re = isinstance(self.search_string, RE_TYPE)
    print "Search '%s' in [%s]..." % (
      self.search_string, self.search_path
    )
    print "_" * 80
    time_begin = time.time()
    file_count = self.walk()
    print "_" * 80
    print "%s files searched in %0.2fsec." % (
      file_count, (time.time() - time_begin)
    )
  def walk(self):
    file_count = 0
    for root, dirlist, filelist in os.walk(self.search_path):
      if ".svn" in root:
        continue
      for filename in filelist:
        for file_filter in self.file_filter:
          if fnmatch.fnmatch(filename, file_filter):
            self.search_file(os.path.join(root, filename))
            file_count += 1
    return file_count
  def search_file(self, filepath):
    f = file(filepath, "r")
    old_content = f.read()
    f.close()
    if self.is_re or self.search_string in old_content:
      new_content = self.replace_content(old_content, filepath)
      if self.is_re and new_content == old_content:
        return
      print filepath
      self.display_plaintext_diff(old_content, new_content)
  def replace_content(self, old_content, filepath):
    if self.is_re:
      new_content = self.search_string.sub(self.replace_string, old_content)
      if new_content == old_content:
        return old_content
    else:
      new_content = old_content.replace(
        self.search_string, self.replace_string
      )
    if self.search_only != False:
      return new_content
    print "Write new content into %s..." % filepath,
    try:
      f = file(filepath, "w")
      f.write(new_content)
      f.close()
    except IOError, msg:
      print "Error:", msg
    else:
      print "OK"
    print
    return new_content
  def display_plaintext_diff(self, content1, content2):
    """
    Display a diff.
    """
    content1 = content1.splitlines()
    content2 = content2.splitlines()
    diff = difflib.Differ().compare(content1, content2)
    def is_diff_line(line):
      for char in ("-", "+", "&#63;"):
        if line.startswith(char):
          return True
      return False
    print "line | text\n-------------------------------------------"
    old_line = ""
    in_block = False
    old_lineno = lineno = 0
    for line in diff:
      if line.startswith(" ") or line.startswith("+"):
        lineno += 1
      if old_lineno == lineno:
        display_line = "%4s | %s" % ("", line.rstrip())
      else:
        display_line = "%4s | %s" % (lineno, line.rstrip())
      if is_diff_line(line):
        if not in_block:
          print "..."
          # Display previous line
          print old_line
          in_block = True
        print display_line
      else:
        if in_block:
          # Display the next line aber a diff-block
          print display_line
        in_block = False
      old_line = display_line
      old_lineno = lineno
    print "..."
if __name__ == "__main__":
  SearchAndReplace(
    search_path=".",
    # e.g.: simple string replace:
    search_string='the old string',
    replace_string='the new string',
    # e.g.: Regular expression replacing (used re.sub)
    #search_string  = re.compile('{% url (.*&#63;) %}'),
    #replace_string = "{% url '\g<1>' %}",
    search_only=True, # Display only the difference
#    search_only   = False, # write the new content
    file_filter=("*.py",), # fnmatch-Filter
  )


python搜索文件并进行内容替换的类就是这样,欢迎大家参考。。。。

python ftp客户端的实现方法

python ftp客户端是如何来实现的呢?下面的内容将会通过具体的实例来演示python ftp客户端的实现方法及相关技巧:

本文实例讲述了python实现简单ftp客户端的方法。分享给大家供大家参考。具体实现方法如下:

#!/usr/bin/python
# -*- coding: utf-8 -*-
import ftplib
import os
import socket
HOST = 'ftp.mozilla.org'
DIRN = 'pub/mozilla.org/webtools'
FILE = 'bugzilla-3.6.9-to-3.6.10-nodocs.diff.gz'
def writedata(data):
  f = open(FILE,'wb')
  try:
    f.write(data)
  finally:
    f.close()
def main():
  try:
    f = ftplib.FTP(HOST)
  except (socket.error, socket.gaierror):
    print 'ERROR:cannot reach " %s"' % HOST
    return
  print '***Connected to host "%s"' % HOST
  try:
    f.login()
  except ftplib.error_perm:
    print 'ERROR: cannot login anonymously'
    f.quit()
    return
  print '*** Logged in as "anonymously"'
  try:
    f.cwd(DIRN)
  except ftplib.error_perm:
    print 'ERRORL cannot CD to "%s"' % DIRN
    f.quit()
    return
  print '*** Changed to "%s" folder' % DIRN
  try:
    #传一个回调函数给retrbinary() 它在每接收一个二进制数据时都会被调用
    f.retrbinary('RETR %s' %FILE, writedata)
  except ftplib.error_perm:
    print 'ERROR: cannot read file "%s"' %FILE
    os.unlink(FILE)
  else:
    print '*** Downloaded "%s" to CWD' % FILE
  f.quit()
  return
if __name__ == '__main__':
  main()


python ftp客户端就是这样,欢迎大家参考。。。。

python基于进程内通讯的聊天室实现方法

python基于进程内通讯的聊天室是如何来实现的呢?下面的内容将会通过具体的实例来演示python基于进程内通讯的聊天室的实现方法及相关技巧:

本文实例讲述了基于进程内通讯的python聊天室实现方法。分享给大家供大家参考。具体如下:

#!/usr/bin/env python
# Added by <ctang@redhat.com>
import sys
import os
from multiprocessing import connection
ADDR = ('', 9997)
AUTH_KEY = '12345'
class Server(object):
  def __init__(self, username):
    self.auth_key = AUTH_KEY
    self.addr = ADDR
    self.username = username
    self.listener = connection.Listener(self.addr, authkey=self.auth_key)
  def listen(self):
    while True:
      conn = self.listener.accept()
      while True:
        try:
          request = conn.recv()
          response = self.response(request)
          conn.send(response)
        except EOFError:
          break
   

python基于进程内通讯的聊天室就是这样,欢迎大家参考。。。。

python简单RPG游戏流程实现

python简单RPG游戏流程是如何来实现的呢?下面的内容将会通过具体的实例来演示python简单RPG游戏流程的实现方法及相关技巧:

本文实例讲述了python实现的简单RPG游戏流程。分享给大家供大家参考。具体如下:

#RPG
rpg = True
whp = 100
mahp = 100
hhp = 100
MHP = 10
def dgrnd () :
 wa = raw_input ("What does Warrior do&#63;")
 ma = raw_input ("What does Mage do&#63;")
 ha = raw_input ("What does Healer do&#63;")
 if wa == "flame slash" :
  print ("Warrior uses Flame Slash!")
  MHP-20
 elif wa == "Dragon Slash" and M == "Dragon" :
  print ("Warrior used Dragon Slash!")
  MHP-80
 if wa == "Dragon" and M == "Troll" or M == "Goblin" :
  print ("Warrior's attack did no damage!")
 if ma == "icicle drop" :
  print ("Mage used Icicle Drop")
  MHP-15
  mahp-10
  whp-10
  hhp-10
 if ma == "flames of heck" :
  MHP-75
  mahp-50
  wph-50
  hhp-50
 if ha == "heal warrior" :
  print ("Healer Heals Warrior!")
  whp + 20
 if ha == "heal mage" :
  print ("Healer Heals Mage!")
  mahp + 20
 if ha == "heal healer" :
  print ("Healer Heals Healer!")
  hhp + 20
 if ha == "attack" :
  print ("Healer Attacks!")
  MHP - 5
  print (M+"attacks!")
 if M == "dragon" :
  whp - 40
  mahp - 40
  hhp - 40
 if M == "Troll" :
  whp - 30
  mahp - 30
  hhp - 30
 if M == "Goblin" :
  whp - 20
  mahp - 20
  hhp -20
 print ("Warrior has "+whp+" HP left, Mage has "+mahp+" HP left, and Healer has "+hhp+" HP left!")
 if MHP == 0 :
  print ("You defeated the "+M+" !")
  print ("That is all I have built so far. Eventually, there will be more!")
  print ("Thank You for Playing!!")
  dgrnd ()
if rpg == True :
 print ("This mode is not yet complete. It only contains a dungeon so far. I'm still working on the rest.")
#Dungeon
 whp = 100
 mahp = 100
 hhp = 100
 MHP = 10
 M = "fail"
 print ("You enter the dungeon")
 rm = raw_input ("There are three passages. Do you take the first one, the second one, or the third one&#63;")
 if rm == 'one' :
  M = 'Troll'
  MHP = 80
  print ("A "+M+" appears!")
 if rm == 'two' :
  M = 'Goblin'
  MHP = 35
  print ("A "+M+" appears!")
 if rm == 'three' :
  M = 'Dragon'
  MHP = 120
  print ("A "+M+" appears!")
 while MHP > 0 :
  dgrnd ()


python简单RPG游戏流程就是这样,欢迎大家参考。。。。

python自动登录人人网并采集信息的实现方法

python自动登录人人网并采集信息是如何来实现的呢?下面的内容将会通过具体的实例来演示python自动登录人人网并采集信息的实现方法及相关技巧:

本文实例讲述了python实现自动登录人人网并采集信息的方法。分享给大家供大家参考。具体实现方法如下:

#!/usr/bin/python
# -*- coding: utf-8 -*-
import sys
import re
import urllib2
import urllib
import cookielib
class Renren(object):
  def __init__(self):
    self.name = self.pwd = self.content = self.domain = self.origURL = ''
    self.operate = ''#登录进去的操作对象
    self.cj = cookielib.LWPCookieJar()
    try:
      self.cj.revert('./renren.coockie')
    except Exception,e:
      print e
    self.opener = urllib2.build_opener(urllib2.HTTPCookieProcessor(self.cj))
    urllib2.install_opener(self.opener)
  def setinfo(self,username,password,domain,origURL):
    '''设置用户登录信息'''
    self.name = username
    self.pwd = password
    self.domain = domain
    self.origURL = origURL
  def login(self):
    '''登录人人网'''
    params = {
      'domain':self.domain,
      'origURL':self.origURL,
      'email':self.name,
      'password':self.pwd}
    print 'login.......'
    req = urllib2.Request(
      'http://www.renren.com/PLogin.do',
      urllib.urlencode(params)
    )
    self.file=urllib2.urlopen(req).read()
    newsfeed = open('news.html','w')
    try:
      newsfeed.write(self.file)
    except Exception, e:
      newsfeed.close()
    self.operate = self.opener.open(req)
    print type(self.operate)
    print self.operate.geturl()
    if self.operate.geturl():
      print 'Logged on successfully!'
      self.cj.save('./renren.coockie')
      self.__viewnewinfo()
    else:
      print 'Logged on error'
  def __viewnewinfo(self):
    '''查看好友的更新状态'''
    self.__caiinfo()
  def __caiinfo(self):
    '''采集信息'''
    h3patten = re.compile('<article>(.*&#63;)</article>')#匹配范围
    apatten = re.compile('<h3.+>(.+)</h3>:')#匹配作者
    cpatten = re.compile('</a>(.+)\s')#匹配内容
    content = h3patten.findall(self.file)
    print len(content)
    infocontent = self.operate.readlines()
    print type(infocontent)
    print 'friend newinfo:'
    for i in infocontent:
      content = h3patten.findall(i)
      if len(content) != 0:
        for m in content:
          username = apatten.findall(m)
          info = cpatten.findall(m)
          if len(username) !=0:
            print username[0],'说:',info[0]
            print '----------------------------------------------'
          else:
            continue
ren = Renren()
username = 'username'#你的人人网的帐号
password = 'password'#你的人人网的密码
domain = 'www.renren.com'#人人网的地址
origURL = 'http://www.renren.com/home'#人人网登录以后的地址
ren.setinfo(username,password,domain,origURL)
ren.login()


python自动登录人人网并采集信息就是这样,欢迎大家参考。。。。

Python将绝对URL替换成相对URL的实现方法

Python将绝对URL替换成相对URL是如何来实现的呢?下面的内容将会通过具体的实例来演示Python将绝对URL替换成相对URL的实现方法及相关技巧:

本文实例讲述了Python实现将绝对URL替换成相对URL的方法。分享给大家供大家参考。具体分析如下:

一、问题:

公司一个项目需要上传图片,一开始同事将图片上传后结合当前主机拼成了一个绝对的URL(http://192.168.1.1:888/m/getimg?filename=xxx.jpg)由于同时给手机终端提供接口,在手机终端会引起一些bug,改完代码后要求将以前的uri替换成相对的URL(/m/getimg?filename=xxx.jpg),由于图片是用img标签嵌入到内容同时用a标签括起显示大图的,所以需要读取数据库并对内容进行替换

二、解决方法:

#!/usr/bin/env python
#-*- coding:utf-8 -*-
#
#
# author : cold night
# email  : wh_linux@126.com
#
import pymongo
import re
from StringIO import StringIO
conn = pymongo.Connection()
db = conn.test
def replace_url():
  regex = re.compile(r'([href&brvbar;src])=["&brvbar;\']http://.*&#63;(/m/getimg\&#63;.*&#63;)["&brvbar;\']')
  results = db['test'].find()
  db_coll = db['test']
  def replace(r):
    content = r.get('content')
    if not content: return
    content = StringIO(content)
    content.seek(0)
    result = StringIO()
    for line in content.readlines():
      t = regex.sub(r'\1="\2"', line)
      result.write(t)
    result.seek(0)
    content = result.read()
    if content:
      r['content'] = content
    _id = r.get('_id')
    db_coll.update({'_id':_id}, r)
  results = [replace(i) for i in results]
if __name__=="__main__":replace_url()


Python将绝对URL替换成相对URL就是这样,欢迎大家参考。。。。

python将html表格转换成CSV文件的实现方法

python将html表格转换成CSV文件是如何来实现的呢?下面的内容将会通过具体的实例来演示python将html表格转换成CSV文件的实现方法及相关技巧:

本文实例讲述了python实现将html表格转换成CSV文件的方法。分享给大家供大家参考。具体如下:

使用方法:python html2csv.py *.html
这段代码使用了 HTMLParser 模块

#!/usr/bin/python
# -*- coding: iso-8859-1 -*-
# Hello, this program is written in Python - http://python.org
programname = 'html2csv - version 2002-09-20 - http://sebsauvage.net'
import sys, getopt, os.path, glob, HTMLParser, re
try:  import psyco ; psyco.jit() # If present, use psyco to accelerate the program
except: pass
def usage(progname):
  ''' Display program usage. '''
  progname = os.path.split(progname)[1]
  if os.path.splitext(progname)[1] in ['.py','.pyc']: progname = 'python '+progname
  return '''%s
A coarse HTML tables to CSV (Comma-Separated Values) converter.
Syntax  : %s source.html
Arguments : source.html is the HTML file you want to convert to CSV.
      By default, the file will be converted to csv with the same
      name and the csv extension (source.html -> source.csv)
      You can use * and &#63;.
Examples  : %s mypage.html
      : %s *.html
This program is public domain.
Author : Sebastien SAUVAGE <sebsauvage at sebsauvage dot net>
     http://sebsauvage.net
''' % (programname, progname, progname, progname)
class html2csv(HTMLParser.HTMLParser):
  ''' A basic parser which converts HTML tables into CSV.
    Feed HTML with feed(). Get CSV with getCSV(). (See example below.)
    All tables in HTML will be converted to CSV (in the order they occur
    in the HTML file).
    You can process very large HTML files by feeding this class with chunks
    of html while getting chunks of CSV by calling getCSV().
    Should handle badly formated html (missing <tr>, </tr>, </td>,
    extraneous </td>, </tr>...).
    This parser uses HTMLParser from the HTMLParser module,
    not HTMLParser from the htmllib module.
    Example: parser = html2csv()
         parser.feed( open('mypage.html','rb').read() )
         open('mytables.csv','w+b').write( parser.getCSV() )
    This class is public domain.
    Author: Sébastien SAUVAGE <sebsauvage at sebsauvage dot net>
        http://sebsauvage.net
    Versions:
      2002-09-19 : - First version
      2002-09-20 : - now uses HTMLParser.HTMLParser instead of htmllib.HTMLParser.
            - now parses command-line.
    To do:
      - handle <pre> tags
      - convert html entities (&name; and &#ref;) to Ascii.
      '''
  def __init__(self):
    HTMLParser.HTMLParser.__init__(self)
    self.CSV = ''   # The CSV data
    self.CSVrow = ''  # The current CSV row beeing constructed from HTML
    self.inTD = 0   # Used to track if we are inside or outside a <td>...</td> tag.
    self.inTR = 0   # Used to track if we are inside or outside a <tr>...</tr> tag.
    self.re_multiplespaces = re.compile('\s+') # regular expression used to remove spaces in excess
    self.rowCount = 0 # CSV output line counter.
  def handle_starttag(self, tag, attrs):
    if  tag == 'tr': self.start_tr()
    elif tag == 'td': self.start_td()
  def handle_endtag(self, tag):
    if  tag == 'tr': self.end_tr()
    elif tag == 'td': self.end_td()
  def start_tr(self):
    if self.inTR: self.end_tr() # <tr> implies </tr>
    self.inTR = 1
  def end_tr(self):
    if self.inTD: self.end_td() # </tr> implies </td>
    self.inTR = 0
    if len(self.CSVrow) > 0:
      self.CSV += self.CSVrow[:-1]
      self.CSVrow = ''
    self.CSV += '\n'
    self.rowCount += 1
  def start_td(self):
    if not self.inTR: self.start_tr() # <td> implies <tr>
    self.CSVrow += '"'
    self.inTD = 1
  def end_td(self):
    if self.inTD:
      self.CSVrow += '",'
      self.inTD = 0
  def handle_data(self, data):
    if self.inTD:
      self.CSVrow += self.re_multiplespaces.sub(' ',data.replace('\t',' ').replace('\n','').replace('\r','').replace('"','""'))
  def getCSV(self,purge=False):
    ''' Get output CSV.
      If purge is true, getCSV() will return all remaining data,
      even if <td> or <tr> are not properly closed.
      (You would typically call getCSV with purge=True when you do not have
      any more HTML to feed and you suspect dirty HTML (unclosed tags). '''
    if purge and self.inTR: self.end_tr() # This will also end_td and append last CSV row to output CSV.
    dataout = self.CSV[:]
    self.CSV = ''
    return dataout
if __name__ == "__main__":
  try: # Put getopt in place for future usage.
    opts, args = getopt.getopt(sys.argv[1:],None)
  except getopt.GetoptError:
    print usage(sys.argv[0]) # print help information and exit:
    sys.exit(2)
  if len(args) == 0:
    print usage(sys.argv[0]) # print help information and exit:
    sys.exit(2)
  print programname
  html_files = glob.glob(args[0])
  for htmlfilename in html_files:
    outputfilename = os.path.splitext(htmlfilename)[0]+'.csv'
    parser = html2csv()
    print 'Reading %s, writing %s...' % (htmlfilename, outputfilename)
    try:
      htmlfile = open(htmlfilename, 'rb')
      csvfile = open( outputfilename, 'w+b')
      data = htmlfile.read(8192)
      while data:
        parser.feed( data )
        csvfile.write( parser.getCSV() )
        sys.stdout.write('%d CSV rows written.\r' % parser.rowCount)
        data = htmlfile.read(8192)
      csvfile.write( parser.getCSV(True) )
      csvfile.close()
      htmlfile.close()
    except:
      print 'Error converting %s    ' % htmlfilename
      try:  htmlfile.close()
      except: pass
      try:  csvfile.close()
      except: pass
  print 'All done. '


python将html表格转换成CSV文件就是这样,欢迎大家参考。。。。

python通过主机名字获得所有ip地址的方法

python通过主机名字获得所有ip地址是如何来实现的呢?下面的内容将会通过具体的实例来演示python通过主机名字获得所有ip地址的实现方法及相关技巧:

本文实例讲述了python实现根据主机名字获得所有ip地址的方法。分享给大家供大家参考。具体实现方法如下:

# -*- coding: utf-8 -*-
import sys, socket
result = socket.getaddrinfo('www.google.com', None, 0, socket.SOCK_STREAM)
counter = 0
for item in result:
  print "%-2d: %s" % (counter, item[4])
  counter += 1
 

运行结果:

0 : ('74.125.128.106', 0)
1 : ('74.125.128.147', 0)
2 : ('74.125.128.99', 0)
3 : ('74.125.128.103', 0)
4 : ('74.125.128.104', 0)
5 : ('74.125.128.105', 0)


python通过主机名字获得所有ip地址就是这样,欢迎大家参考。。。。

python自动zip压缩目录的实现

python自动zip压缩目录是如何来实现的呢?下面的内容将会通过具体的实例来演示python自动zip压缩目录的实现方法及相关技巧:

本文实例讲述了python自动zip压缩目录的方法。分享给大家供大家参考。具体实现方法如下:

这段代码来压缩数据库备份文件,没有使用python内置的zip模块,而是使用了zip.exe文件

# Hello, this script is written in Python - http://www.python.org
#
# autozip.py 1.0p
#
# This script will scan a directory (and its subdirectories)
# and automatically zip files (according to their extensions).
#
# This script does not use Python internal ZIP routines.
# InfoZip's ZIP.EXE must be present in the path (InfoZip Dos version 2.3).
# (zip23x.zip at http://www.info-zip.org/pub/infozip/)
#
# Each file will be zipped under the same name (with the .zip extension)
# eg. toto.bak will be zipped to toto.zip
#
# This script is public domain. Feel free to reuse it.
# The author is:
#    Sebastien SAUVAGE
#    <sebsauvage at sebsauvage dot net>
#    http://sebsauvage.net
#
# More quick & dirty scripts are available at http://sebsauvage.net/python/
#
# Directory to scan is hardcoded at the end of the script.
# Extensions to ZIP are hardcoded below:
ext_list = ['.bak','.trn']
import os.path, string
def autozip( directory ):
  os.path.walk(directory,walk_callback,'')
def walk_callback(args,directory,files):
  print 'Scanning',directory
  for fileName in files:
    if os.path.isfile(os.path.join(directory,fileName)) and string.lower(os.path.splitext(fileName)[1]) in ext_list:
      zipMyFile ( os.path.join(directory,fileName) )
def zipMyFile ( fileName ):
  os.chdir( os.path.dirname(fileName) )
  zipFilename = os.path.splitext(os.path.basename(fileName))[0]+".zip"
  print ' Zipping to '+ zipFilename
  os.system('zip -mj9 "'+zipFilename+'" "'+fileName+'"')
autozip( r'C:\mydirectory' )
print "All done."


python自动zip压缩目录就是这样,欢迎大家参考。。。。

python查找具有相同内容的文件

python查找具有相同内容的文件是如何来实现的呢?下面的内容将会通过具体的实例来演示python查找具有相同内容的文件的实现方法及相关技巧:

本文实例讲述了python查找指定具有相同内容文件的方法。分享给大家供大家参考。具体如下:

python代码用于查找指定具有相同内容的文件,可以同时指定多个目录
调用方式:python doublesdetector.py c:\;d:\;e:\ > doubles.txt

# Hello, this script is written in Python - http://www.python.org
# doublesdetector.py 1.0p
import os, os.path, string, sys, sha
message = """
doublesdetector.py 1.0p
This script will search for files that are identical
(whatever their name/date/time).
 Syntax : python %s <directories>
   where <directories> is a directory or a list of directories
   separated by a semicolon (;)
Examples : python %s c:\windows
      python %s c:\;d:\;e:\ > doubles.txt
      python %s c:\program files > doubles.txt
This script is public domain. Feel free to reuse and tweak it.
The author of this script Sebastien SAUVAGE <sebsauvage at sebsauvage dot net>
http://sebsauvage.net/python/
""" % ((sys.argv[0], )*4)
def fileSHA ( filepath ) :
  """ Compute SHA (Secure Hash Algorythm) of a file.
    Input : filepath : full path and name of file (eg. 'c:\windows\emm386.exe')
    Output : string : contains the hexadecimal representation of the SHA of the file.
             returns '0' if file could not be read (file not found, no read rights...)
  """
  try:
    file = open(filepath,'rb')
    digest = sha.new()
    data = file.read(65536)
    while len(data) != 0:
      digest.update(data)
      data = file.read(65536)
    file.close()
  except:
    return '0'
  else:
    return digest.hexdigest()
def detectDoubles( directories ):
  fileslist = {}
  # Group all files by size (in the fileslist dictionnary)
  for directory in directories.split(';'):
    directory = os.path.abspath(directory)
    sys.stderr.write('Scanning directory '+directory+'...')
    os.path.walk(directory,callback,fileslist)
    sys.stderr.write('\n')
  sys.stderr.write('Comparing files...')
  # Remove keys (filesize) in the dictionnary which have only 1 file
  for (filesize,listoffiles) in fileslist.items():
    if len(listoffiles) == 1:
      del fileslist[filesize]
  # Now compute SHA of files that have the same size,
  # and group files by SHA (in the filessha dictionnary)
  filessha = {}
  while len(fileslist)>0:
    (filesize,listoffiles) = fileslist.popitem()
    for filepath in listoffiles:
      sys.stderr.write('.')
      sha = fileSHA(filepath)
      if filessha.has_key(sha):
        filessha[sha].append(filepath)
      else:
        filessha[sha] = [filepath]
  if filessha.has_key('0'):
    del filessha['0']
  # Remove keys (sha) in the dictionnary which have only 1 file
  for (sha,listoffiles) in filessha.items():
    if len(listoffiles) == 1:
      del filessha[sha]
  sys.stderr.write('\n')
  return filessha
def callback(fileslist,directory,files):
  sys.stderr.write('.')
  for fileName in files:
    filepath = os.path.join(directory,fileName)
    if os.path.isfile(filepath):
      filesize = os.stat(filepath)[6]
      if fileslist.has_key(filesize):
        fileslist[filesize].append(filepath)
      else:
        fileslist[filesize] = [filepath]
if len(sys.argv)>1 :
  doubles = detectDoubles(" ".join(sys.argv[1:]))
  print 'The following files are identical:'
  print '\n'.join(["----\n%s" % '\n'.join(doubles[filesha]) for filesha in doubles.keys()])
  print '----'
else:
  print message


python查找具有相同内容的文件就是这样,欢迎大家参考。。。。

python中getaddrinfo()函数用法实例分析

python中getaddrinfo()函数是如何来使用的呢?下面的内容将会通过具体的实例来演示python中getaddrinfo()函数的使用方法及相关技巧:

本文实例讲述了python中getaddrinfo()基本用法。分享给大家供大家参考。具体如下:

import sys, socket
result = socket.getaddrinfo("192.1.1.100", None)
print result[0][4]
print result
 

输出结果:

('172.20.53.102', 0)
[(2, 0, 0, '', ('172.20.53.102', 0))]


python中getaddrinfo()函数就是这样,欢迎大家参考。。。。

python搜索指定目录下文件及文件内的指定关键词的方法

python搜索指定目录下文件及文件内的指定关键词是如何来实现的呢?下面的内容将会通过具体的实例来演示python搜索指定目录下文件及文件内的指定关键词的实现方法及相关技巧:

本文实例讲述了python实现搜索指定目录下文件及文件内搜索指定关键词的方法。分享给大家供大家参考。具体实现方法如下:

#!/usr/bin/python -O
# -*- coding: UTF-8 -*-
"""
Sucht rekursiv in Dateiinhalten und listet die Fundstellen auf.
"""
__author__ = "Jens Diemer"
__license__ = """GNU General Public License v2 or above -
 http://www.opensource.org/licenses/gpl-license.php"""
__url__ = "http://www.jensdiemer.de"
__version__ = "0.1"
import os, time, fnmatch
class search:
  def __init__(self, path, search_string, file_filter):
    self.search_path = path
    self.search_string = search_string
    self.file_filter = file_filter
    print "Search '%s' in [%s]..." % (
      self.search_string, self.search_path
    )
    print "_" * 80
    time_begin = time.time()
    file_count = self.walk()
    print "_" * 80
    print "%s files searched in %0.2fsec." % (
      file_count, (time.time() - time_begin)
    )
  def walk(self):
    file_count = 0
    for root, dirlist, filelist in os.walk(self.search_path, followlinks=True):
      for filename in filelist:
        for file_filter in self.file_filter:
          if fnmatch.fnmatch(filename, file_filter):
            self.search_file(os.path.join(root, filename))
            file_count += 1
    return file_count
  def search_file(self, filepath):
    f = file(filepath, "r")
    content = f.read()
    f.close()
    if self.search_string in content:
      print filepath
      self.cutout_content(content)
  def cutout_content(self, content):
    current_pos = 0
    search_string_len = len(self.search_string)
    for i in xrange(max_cutouts):
      try:
        pos = content.index(self.search_string, current_pos)
      except ValueError:
        break
      content_window = content[ pos - content_extract : pos + content_extract ]
      print ">>>", content_window.encode("String_Escape")
      current_pos += pos + search_string_len
    print
if __name__ == "__main__":
  search_path = r"c:\texte"
  file_filter = ("*.py",) # fnmatch-Filter
  search_string = "history"
  content_extract = 35 # Gr&#65533;&#65533;e des Ausschnittes der angezeigt wird
  max_cutouts = 20 # Max. Anzahl an Treffer, die Angezeigt werden sollen
  search(search_path, search_string, file_filter)


python搜索指定目录下文件及文件内的指定关键词就是这样,欢迎大家参考。。。。

Python中关闭文件操作的机制

下面的内容主要介绍了Python中关闭文件操作的机制,,欢迎大家参考:

如果不用“with”,那么Python会在何时关闭文件呢?答案是:视情况而定。

Python程序员最初学到的东西里有一点就是可以通过迭代法很容易地遍历一个打开文件的全文:

f = open('/etc/passwd')
for line in f:
  print(line)
 

注意上面的代码具有可行性,因为我们的文件对象“f”是一个迭代器。换句话说,“f“ 知道在一个循环或者任何其他的迭代上下文中做什么,比如像列表解析。

我的Python课堂上的大多数学生都具有其他编程语言背景,在使用以前所熟悉的语言时,他们总是在完成文件操作时被期望关闭文件。因此,在我向他们介绍了Python文件操作的内容不久后他们问起如何在Python中关闭文件时,我一点都不惊讶。

最简单的回答就是我们可以通过调用f.close()显式地关闭文件。一旦我们关闭了文件,该文件对象依然存在,但是我们无法再通过它来读取文件内容了,而且文件对象返回的可打印内容也表明文件已经被关闭。

>>> f = open('/etc/passwd')
>>> f
<open file '/etc/passwd', mode 'r' at 0x10f023270>
>>> f.read(5)
'##n# '
f.close()
>>> f
<closed file '/etc/passwd', mode 'r' at 0x10f023270>
f.read(5)
---------------------------------------------------------------------------
ValueError Traceback (most recent call last)
<ipython-input-11-ef8add6ff846> in <module>()
----> 1 f.read(5)
ValueError: I/O operation on closed file
 

所以是这样,我在用Python编程的时候,很少明确地对文件调用 “close” 方法。此外,你也很可能不想或不必那样做。

打开文件的优选最佳实践方式是使用 “with” 语句,就像如下所示:

with open('/etc/passwd') as f:
  for line in f:
    print(line)
 

“with”语句对 “f” 文件对象调用在Python中称作“上下文管理器”的方法。也就是说,它指定 “f” 为指向 /etc/passwd 内容的新的文件实例。在 “with” 打开的代码块内,文件是打开的,而且可以自由读取。

然而,一旦Python代码从 “with” 负责的代码段退出,文件会自动关闭。试图在我们退出 “with”代码块后从 f 中读取内容会导致和上文一样的 ValueError 异常。所以,通过使用 “with”,你避免了显式地关闭文件的操作。Python 会以一种不那么有 Python 风格的方式在幕后神奇而静静地替你关闭文件。

但是你不显式地关闭文件会怎样?如果你有点懒,既不使用 “with” 代码块也不调用f.close()怎么办?这时文件会什么时候关闭?何时应该关闭文件?

我之所以问这个,是因为我教了这么多年Python,确信努力教授“with”或上下文管理器的同时又教很多其它的话题超出了学生接受的范围。在介绍性课程谈及 “with” 时,我一般会告诉学生在他们职业生涯中遇到这个问题时,让Python去关闭文件就好,不论文件对象的应用计数降为0还是Python退出时。

在我的Python文件操作免费e-mail课程中,我并没有在所有的解决方案中使用with,想看看如何。结果一些人质疑我,说不使用“with”会向人们展示一种糟糕的实践方案并且会有数据未写入磁盘的风险。

我收到了很多关于此话题的邮件,于是我问自己:如果我们没有显式地关闭文件或者没用“with”代码块,那么Python会何时关闭文件?也就是说,如果我让文件自动关闭,那么会发生什么?

我总是假定当对象的引用计数降为0时,Python会关闭文件,进而垃圾回收机制清理文件对象。当我们读文件时很难证明或核实这一点,但写入文件时却很容易。这是因为当写入文件时,内容并不会立即刷新到磁盘(除非你向“open”方法的第三个可选参数传入“False”),只有当文件关闭时才会刷新。

于是我决定做些实验以便更好地理解Python到底能自动地为我做什么。我的实验包括打开一个文件、写入数据、删除引用和退出Python。我很好奇数据是什么时候会被写入,如果有的话。

我的实验是这个样子:

f = open('/tmp/output', 'w')
f.write('abcn')
f.write('defn')
# check contents of /tmp/output (1)
del(f)
# check contents of /tmp/output (2)
# exit from Python
# check contents of /tmp/output (3)
 

我在Mac平台上用Python 2.7.9 做了第一个实验,报告显示在阶段一文件存在但是是空的,阶段二和阶段三中文件包含所有的内容。这样,在CPython 2.7中我最初的直觉似乎是正确的:当一个文件对象被垃圾回收时,它的 __del__ (或者等价的)方法会刷新并关闭文件。而且在我的IPython进程中调用“lsof”命令显示文件确实在引用对象移除后被关闭了。

那 Python3 如何呢?我在Mac上 Python 3.4.2 环境下做了以上的实验,得到了相同的结果。移除对文件对象最后的引用后会导致文件被刷新并且被关闭。

这对于 Python 2.7 和 3.4 很好。但是在 PyPy 和 Jython下的替代实现会怎样呢?或许情况会有些不同。

于是我在 PyPy 2.7.8 下做了相同的实验。而这次,我得到了不同的结果!删除文件对象的引用后——也就是在阶段2,并没有导致文件内容被刷入磁盘。我不得不假设这和垃圾回收机制的不同或其他在 PyPy 和 CPython中工作机制的不同有关系。但是如果你在 PyPy中运行程序,就绝不要指望仅仅因为文件对象的引用结束,文件就会被刷新和关闭。命令 lsof 显示直到Python进程退出时文件才会被释放。

为了好玩,我决定尝试一下 Jython 2.7b3. 结果Jython 表现出了和PyPy一样的行为。也就是说,从 Python 退出确实会确保缓存中的数据写入磁盘。

我重做了这些实验,但是我把 “abcn”和 “defn”换成了 “abcn”*1000 和“defn”*1000.

在 Python 2.7 的环境下,“abcn” * 1000 语句执行后没有任何东西写入。但“defn” * 1000 语句执行后,文件包含有4096个字节——可能代表缓冲区的大小。调用 del(f) 删除文件对象的引用导致数据被刷入磁盘和文件关闭,此时文件中共有8000字节的数据。所以忽略字符串大小的话 Python 2.7 的行为表现基本相同。唯一不同的是如果超出了缓冲区的大小,那么一些数据将在最后文件关闭数据刷新前写入磁盘。

换做是Python 3的话,情况就有些不同了。f.write执行后没有任何数据会写入。但是文件对象引用一旦结束,文件就会刷新并关闭。这可能是缓冲区很大的缘故。但毫无疑问,删除文件对象引用会使文件刷新并关闭。

至于 PyPy 和 Jython,对大文件和小文件的操作结果都一样:文件在 PyPy 或 Jython 进程结束的时候刷新并关闭,而不是在文件对象的引用结束的时候。

为了再次确认,我又使用 “with” 进行了实验。在所有情况下,我们都能够轻松的预测文件是何时被刷新和关闭的——就是当退出代码段,并且上下文管理器在后台调用合适方法的时候。

换句话说,如果你不使用“with”,那么至少在非常简单的情形下,你的数据不一定有丢失的危险。然而你还是不能确定数据到底是在文件对象引用结束还是程序退出的时候被保存的。如果你假定因为对文件唯一的引用是一个本地变量所以文件在函数返回时会关闭,那么事实一定会让你感到吃惊。如果你有多个进程或线程同时对一个文件进行写操作,那么你真的要非常小心了。

或许这个行为可以更好地定义不就可以在不同的平台上表现得基本一致了吗?也许我们甚至可以看看Python规范的开始,而不是指着CPython说“Yeah,不管版本如何总是对的”。

我依然觉得“with”和上下文管理器很棒。而且我想对于Python新手,理解“with”的工作原理很难。但我还是不得不提醒新手开发者注意:如果他们决定使用Python的其他可选版本,那么会出现很多不同于CPython的古怪情况而且如果他们不够小心,甚至会深受其害。


Python中关闭文件操作的机制就是这样,欢迎大家参考。。。。

python实现linux中xcopy的方法

python实现linux中xcopy是如何来实现的呢?下面的内容将会通过具体的实例来演示python实现linux中xcopy的实现方法及相关技巧:

本文实例讲述了python实现linux下使用xcopy的方法。分享给大家供大家参考。具体如下:

这个python函数模仿windows下的xcopy命令编写,可以用在linux下

#!/usr/bin/python
# -*- coding: UTF-8 -*-
"""
xcopy for Linux...
Use:
______________________________________________________________________________
import sys, os
sys.path.insert(0,r"/path/to/LinuxXCopy")
from LinuxXCopy import XCopy
filters = ["*.py"]
xc = XCopy(os.getcwd(), "/tmp/test", filters)
______________________________________________________________________________
"""
__author__ = "Jens Diemer"
__license__ = """GNU General Public License v2 or above -
 http://www.opensource.org/licenses/gpl-license.php"""
__url__   = "http://www.jensdiemer.de"
__info__  = ""
__version__="0.1"
__history__="""
v0.1
  - erste Version
"""
import os, shutil, fnmatch
class XCopy:
  def __init__(self, src, dst, filters=[]):
    self.filters = filters
    self.copytree(src, dst)
  def copytree(self, src, dst):
    """
    Based in shutil.copytree()
    """
    names = os.listdir(src)
    if not os.path.isdir(dst):
      os.makedirs(dst)
    errors = []
    for name in names:
      srcname = os.path.join(src, name)
      dstname = os.path.join(dst, name)
      if os.path.isdir(srcname):
        self.copytree(srcname, dstname)
      elif os.path.isfile(srcname):
        if self.filterName(name):
          print "copy:", name, dstname
          shutil.copy2(srcname, dstname)
    shutil.copystat(src, dst)
  def filterName(self, fileName):
    for filter in self.filters:
      if fnmatch.fnmatch(fileName, filter):
        return True
    return False


python实现linux中xcopy就是这样,欢迎大家参考。。。。