How to Install Netbeans on Ubuntu 16.04 or 18.04
This post will guide you how to install NetBeans IDE for development on your Ubuntu Linux 18.04 or 16.04. How do I install the latest NetBeans IDE tool on your Ubuntu Linux system.
- What is Netbeans?
- Prerequisites
- Step1: Install JAVA
- Step2: Downloading Netbeans IDE
- Step3: Unzip Netbeans IDE Binary
- Step4: Starting Netbeans IDE

What is Netbeans?
NetBeans is an integrated development environment for Java. NetBeans allows applications to be developed from a set of modular software components called modules. NetBeans runs on Windows, macOS, Linux and Solaris.
NetBeans is one of the most popular Java IDE for development. And NetBeans is based on Java, so it requires Java JDK. And it is also a cross-platform IDE, and you can use this IDE tool to develop application in JAVA, PHP or other languages.
NetBeans IDE can be used to develop Web, Desktop and Mobile Applications from its framework.
Prerequisites
- Before you get started with this post, and you need to have a non-root user with sudo privileges so that you can update or install packages under Ubuntu system.
- Before you begin, you also need to update the package index and all installed packages to the latest version on your Ubuntu system with the following steps:
$ sudo apt update
$ sudo apt upgrade
Step1: Install JAVA JDK 8
NetBeans IDE requires Java JDK 8 environment, so you need to install JDK on your Ubuntu system.
You can install either the Oracle JAVA Standard Edition 8 or OpenJDK 8 on the system.
The OpenJDK 8 is already available in the default Ubuntu APT repository. So we try to install the OpenJDK 8 on this guide, just type the following command to update the packages index and installing OpenJDK 8:
$ sudo apt install openjdk-8-jdk
Outputs:
devops@devops:~$ sudo apt install openjdk-8-jdk

Reading package lists... Done

Building dependency tree

Reading state information... Done

The following additional packages will be installed:

ca-certificates-java libxt-dev openjdk-8-jdk-headless openjdk-8-jre openjdk-8-jre-headless

Suggested packages:

libxt-doc openjdk-8-demo openjdk-8-source visualvm icedtea-8-plugin fonts-ipafont-gothic fonts-ipafont-mincho fonts-wqy-microhei fonts-wqy-zenhei

The following NEW packages will be installed:

ca-certificates-java libxt-dev openjdk-8-jdk openjdk-8-jdk-headless openjdk-8-jre openjdk-8-jre-headless

0 upgraded, 6 newly installed, 0 to remove and 45 not upgraded.

Need to get 37.5 MB/37.5 MB of archives.

After this operation, 143 MB of additional disk space will be used.

Do you want to continue? [Y/n] Y
After JDK package is installed, you can check the installation of JDK package by print the version of JDK installed, type:
$ java -version
Outputs:
devops@devops:~$ java -version

openjdk version "1.8.0_191"

OpenJDK Runtime Environment (build 1.8.0_191-8u191-b12-2ubuntu0.18.04.1-b12)

OpenJDK 64-Bit Server VM (build 25.191-b12, mixed mode)
Note: If you want to install the Oracle JAVA 8 on your Ubuntu system, just issue the following commands:
$ sudo add-apt-repository ppa:webupd8team/java

$ sudo apt update

$ sudo apt install oracle-java8-installer –y
Step2: Downloading Netbeans IDE
After Java JDK is installed on your Ubunt system, you can begin to download the latest NetBeans installer from its official web site https://netbeans.apache.org/download/index.html with the following wget command:
$ wget https://www.apache.org/dyn/closer.cgi/incubator/netbeans/incubating-netbeans/incubating-11.0/incubating-netbeans-11.0-bin.zip
Outputs:
devops@devops:~$ wget https://www.apache.org/dyn/closer.cgi/incubator/netbeans/incubating-netbeans/incubating-11.0/incubating-netbeans-11.0-bin.zip --2019-08-20 10:20:27--  https://www.apache.org/dyn/closer.cgi/incubator/netbeans/incubating-netbeans/incubating-11.0/incubating-netbeans-11.0-bin.zip

Resolving www.apache.org (www.apache.org)... 40.79.78.1, 95.216.24.32, 2a01:4f9:2a:185f::2

Connecting to www.apache.org (www.apache.org)|40.79.78.1|:443... connected.

HTTP request sent, awaiting response... 200 OK

Length: 318063051 (303M) [application/zip]

Saving to: ‘incubating-netbeans-11.0-bin.zip’

incubating-netbeans-11.0-bin.zip     100%[======================================================================>] 303.33M  6.42MB/s    in 56s

2019-08-20 10:24:37 (5.45 MB/s) - ‘incubating-netbeans-11.0-bin.zip’ saved [318063051/318063051]
Step3: Unzip Netbeans IDE Binary
Once Netbeans IDE package is downloaded on your local disk, and you still need to unzip the binary of Netbeans with the Unzip command. Type:
$ unzip incubating-netbeans-11.0-bin.zip
Outputs:
$ unzip incubating-netbeans-11.0-bin.zip

……

inflating: netbeans/licenses/MPL-1.0

  inflating: netbeans/licenses/Maven-CDDL-1.0

  inflating: netbeans/licenses/Maven-EPL-v10

  inflating: netbeans/licenses/Maven-MIT

  inflating: netbeans/licenses/Maven-PD

  inflating: netbeans/licenses/Maven-jsoup

  inflating: netbeans/licenses/OSGi

  inflating: netbeans/licenses/UPL

  inflating: netbeans/licenses/W3C

  inflating: netbeans/licenses/W3C2

  inflating: netbeans/licenses/WSDL-2004

  inflating: netbeans/licenses/freemarker

  inflating: netbeans/netbeans.css
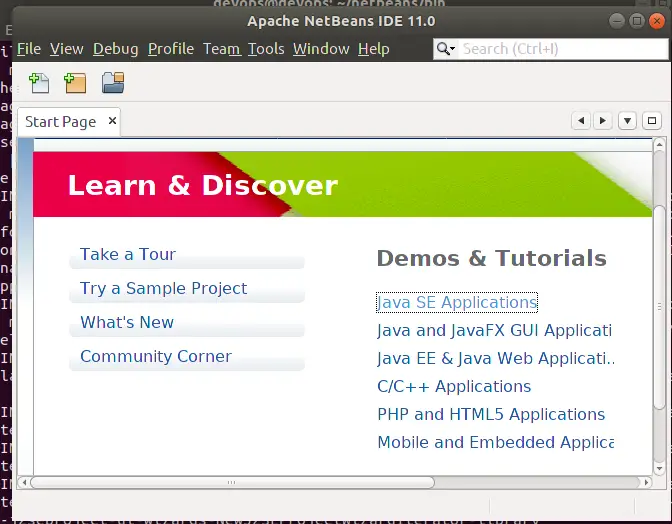
Step4: Starting Netbeans IDE
After unzipping the binary of NetBeans in your current directory, you need to change the current directory to ./netbeans/bin, and then run the following command to lauch Netbeans IDE.
$ cd ./netbeans/bin/$ ./netbeans

Conclusion
You should know that how to install NetBeans IDE tool on your Ubuntu or Debian Linux. If you want to see more detailed information about NetBeans , you can directly go to its official web site.