How to Install And Configure WildFly (JBoss) on Ubuntu 16.04 or 18.04
This post will guide you how to install and configure the latest WildFly application on your Ubuntu Linux 18.04 or 16.04 or Debian Linux. How do I install WildFly (JBoss) Application Server on my Ubuntu system.
- What is WildFly?
- Prerequisites
- Step1: Installing JAVA
- Step2: Downloading WildFly
- Step3: Installing WildFly
- Step4: Creating a User for WildFly
- Step5: Configuring Systemd for WildFly
- Step6: Add a User to Access Management Console
- Step7: Accessing WildFly Management Console
- Step8: Accessing WildFly Web Page

What is WildFly?
WildFly is a flexible, lightweight, managed application runtime that helps you build amazing applications. Currently, the latest version is WildFly 17.01. WildFly can be run on multiple platforms including windows and Linux.
WildFly, formaly know as JBoss is an application server written in Java language, and it is developed by Red Hat. It is one of the most popular open source Java server applications. WildFly implements the latest in enterprise Java standards. WildFly takes an aggressive approach to memory management.
WildFly offers two modes: a traditional, single JVM, standalone mode, and a multi-JVM option, domain mode, which synchronizes configuration across any number of processes and hosts.
WildFly supports the latest standards for web development. Web Socket support allows your applications the ability to use optimized custom protocols and full-duplex communication with your backend infrastructure.
Prerequisites
You need to have a non-root user with sudo privileges so that you can install necessary packages on your Ubuntu system.
Step1: Installing JAVA
As the WildFly Application is written in Java language, so you need to install Java Development kit on your Ubuntu system. You can install either OpenJDK or Java SE Development Kit on you system. The OpenJDK is already available on the default Ubuntu APT repository, so the easiest way of installing java ENV is installing OpenJDK with the following command on your Ubuntu or Debian system.
Firstly, you need to update your system to make sure that your Ubuntu server OS packages are fully up-to-date with the following two commands:
$ sudo apt update
$ sudo apt upgrade
Then you can begin to install OpenJDK with the below apt command:
$ sudo apt install default-jdk -y
Outputs:
devops@devops:~$ sudo apt install default-jdk

[sudo] password for devops:

Reading package lists... Done

Building dependency tree

Reading state information... Done

The following additional packages will be installed:

  default-jdk-headless default-jre default-jre-headless openjdk-11-jdk openjdk-11-jdk-headless openjdk-11-jre openjdk-11-jre-headless

Suggested packages:

  openjdk-11-demo openjdk-11-source visualvm fonts-ipafont-gothic fonts-ipafont-mincho fonts-wqy-microhei | fonts-wqy-zenhei

The following NEW packages will be installed:

  default-jdk default-jdk-headless default-jre default-jre-headless openjdk-11-jdk openjdk-11-jdk-headless openjdk-11-jre openjdk-11-jre-headless

0 upgraded, 8 newly installed, 0 to remove and 76 not upgraded.

Need to get 225 MB of archives.

After this operation, 367 MB of additional disk space will be used.

Do you want to continue? [Y/n]

……

update-alternatives: using /usr/lib/jvm/java-11-openjdk-amd64/bin/jhsdb to provide /usr/bin/jhsdb (jhsdb) in auto mode

Processing triggers for gnome-menus (3.13.3-11ubuntu1.1) ...

Processing triggers for hicolor-icon-theme (0.17-2) ...

Setting up default-jre-headless (2:1.11-68ubuntu1~18.04.1) ...

Setting up default-jdk-headless (2:1.11-68ubuntu1~18.04.1) ...

Setting up openjdk-11-jre:amd64 (11.0.3+7-1ubuntu2~18.04.1) ...

Setting up default-jre (2:1.11-68ubuntu1~18.04.1) ...

Setting up openjdk-11-jdk:amd64 (11.0.3+7-1ubuntu2~18.04.1) ...

update-alternatives: using /usr/lib/jvm/java-11-openjdk-amd64/bin/jconsole to provide /usr/bin/jconsole (jconsole) in auto mode

Setting up default-jdk (2:1.11-68ubuntu1~18.04.1) ...
The JDK should be installed on your Ubuntu system, you can test the installation by checking the JAVA version with the following command:
$ java –version
Outputs:
devops@devops:~$ java --version

openjdk 11.0.3 2019-04-16

OpenJDK Runtime Environment (build 11.0.3+7-Ubuntu-1ubuntu218.04.1)

OpenJDK 64-Bit Server VM (build 11.0.3+7-Ubuntu-1ubuntu218.04.1, mixed mode, sharing)
From the above output, you would see that the current version of Java is 11.03.
Step2: Downloading WildFly
You need to go the official download page of WildFly application to get the latest version. As of writing this post, the latest release version of WildFly (JBoss) is 17.01. you can download the WildFly archive file using the following wget command:
$ wget https://download.jboss.org/wildfly/17.0.1.Final/wildfly-17.0.1.Final.tar.gz
Outputs:
devops@devops:~$ wget https://download.jboss.org/wildfly/17.0.1.Final/wildfly-17.0.1.Final.tar.gz

--2019-07-11 06:18:05--  https://download.jboss.org/wildfly/17.0.1.Final/wildfly-17.0.1.Final.tar.gz

Resolving download.jboss.org (download.jboss.org)... 23.42.94.23

Connecting to download.jboss.org (download.jboss.org)|23.42.94.23|:443... connected.

HTTP request sent, awaiting response... 200 OK

Length: 183598392 (175M) [application/x-gzip]

Saving to: ‘wildfly-17.0.1.Final.tar.gz’

wildfly-17.0.1.Final.tar.gz              100%[=================================================================================>] 175.09M  4.07MB/s    in 40s

2019-07-11 06:18:46 (4.42 MB/s) - ‘wildfly-17.0.1.Final.tar.gz’ saved [183598392/183598392]
Step3: Installing WildFly
Once the WildFly archive file is downloaded in your local disk. And you need to extract all files into /opt/wildfly directory.
Firstly, extract the archive file with the below tar command:
$ tar -xvf wildfly-17.0.1.Final.tar.gz
Then, move all files to /opt/wildfly directory, type:
$ sudo mv wildfly-17.0.1.Final /opt/wildfly
Step4: Creating a User for WildFly
Now you need to create a new system user and group called wildfly with home directory /opt/wildfly, it will be used to run the WildFly daemon on your Ubuntu system. Just issue the following two command to create a new system user and system group:
$ sudo groupadd --system wildfly

$ sudo useradd -s /sbin/nologin  --system -d /opt/wildfly -g wildfly wildfly
Checking if wildfly is created correctly with the following command:
$ id wildfly
Outputs:
devops@devops:~$ id wildfly

uid=999(wildfly) gid=999(wildfly) groups=999(wildfly)
Step5: Configuring Systemd for WildFly
You can create a systemd service for WildFly application, just do the following steps:
#1 create a configuration directory for WildFly under /etc directory with the below command:
$ sudo mkdir /etc/wildfly
#2 Copy configuration file of WildFly from /opt/wildfly to /etc/wildfily with the following command:
$ sudo cp /opt/wildfly/docs/contrib/scripts/systemd/wildfly.conf /etc/wildfly/
#3 Copy systemd service file of WildFly from /opt/wildfly to /etc/system/system/ directory, type:
$ sudo cp /opt/wildfly/docs/contrib/scripts/systemd/wildfly.service /etc/systemd/system/
#4 copy start script templates from /opt/wildfly to /opt/wildfly/bin/ directory, type:
$ sudo cp /opt/wildfly/docs/contrib/scripts/systemd/launch.sh /opt/wildfly/bin/
#5 adding executable permission for launch.sh file, type:
$ chmod u+x /opt/wildfly/bin/launch.sh
#6 you need to notify systemd that you created a new daemon file, just using the following command:
$ sudo systemctl daemon-reload
#7 then you can start the WildFly service by executing the following command:
$ sudo systemctl start wildfly

$ sudo systemctl enable wildfly

$ sudo systemctl status wildfly
Outputs:
root@devops:/opt/wildfly# systemctl status wildfly
wildfly.service - The WildFly Application Server
   Loaded: loaded (/etc/systemd/system/wildfly.service; enabled; vendor preset: enabled)

   Active: active (running) since Thu 2019-07-11 08:24:53 EDT; 2s ago

 Main PID: 451 (launch.sh)

    Tasks: 15 (limit: 1129)

   CGroup: /system.slice/wildfly.service

           ├─451 /bin/bash /opt/wildfly/bin/launch.sh standalone standalone.xml 0.0.0.0

           ├─452 /bin/sh /opt/wildfly/bin/standalone.sh -c standalone.xml -b 0.0.0.0

           └─546 java -D[Standalone] -server -Xms64m -Xmx512m -XX:MetaspaceSize=96M -XX:MaxMetaspaceSize=256m -Djava.net.preferIPv4Stack=true -Djboss.modules.system.pkgs=org.jboss.byteman -

Jul 11 08:24:53 devops systemd[1]: Started The WildFly Application Server.
Step6: Add a User to Access Management Console
Now the WildFly application is installed on your ubuntu system, and if you want to connect to WildFly Management console, you still need to create a user who can access WildFly console. WildFly has provided a script for adding user to WildFly application server. Just executing the following command:
$ sudo /opt/wildfly/bin/add-user.sh
You need to ask what type of user do you want to add, just type letter a to select the first type to add a Management User, then press Enter key on your keyboard.
Outputs:
devops@devops:~$ sudo /opt/wildfly/bin/add-user.sh

[sudo] password for devops:

What type of user do you wish to add?
a) Management User (mgmt-users.properties)
b) Application User (application-users.properties)
(a): a
Then you need to type a username for user, and set password for that user, press Enter key.
Enter the details of the new user to add.

Using realm 'ManagementRealm' as discovered from the existing property files.

Username : osetc

Password recommendations are listed below. To modify these restrictions edit the add-user.properties configuration file.

 - The password should be different from the username

 - The password should not be one of the following restricted values {root, admin, administrator}

 - The password should contain at least 8 characters, 1 alphabetic character(s), 1 digit(s), 1 non-alphanumeric symbol(s)

Password :

WFLYDM0098: The password should be different from the username

Are you sure you want to use the password entered yes/no? yes

Re-enter Password :
Next, you need to enter and agree to the others prompts to finish the user creation.
What groups do you want this user to belong to? (Please enter a comma separated list, or leave blank for none)[  ]:

About to add user 'osetc' for realm 'ManagementRealm'

Is this correct yes/no? yes

Added user 'osetc' to file '/opt/wildfly/standalone/configuration/mgmt-users.properties'

Added user 'osetc' to file '/opt/wildfly/domain/configuration/mgmt-users.properties'

Added user 'osetc' with groups  to file '/opt/wildfly/standalone/configuration/mgmt-groups.properties'

Added user 'osetc' with groups  to file '/opt/wildfly/domain/configuration/mgmt-groups.properties'

Is this new user going to be used for one AS process to connect to another AS process?

e.g. for a slave host controller connecting to the master or for a Remoting connection for server to server EJB calls.

yes/no? yes

To represent the user add the following to the server-identities definition <secret value="b3NldGM=" />
From the above outputs, you should see that the new user will be added to file ‘/opt/wildfly/domain/configuration/mgmt-users.properties‘.
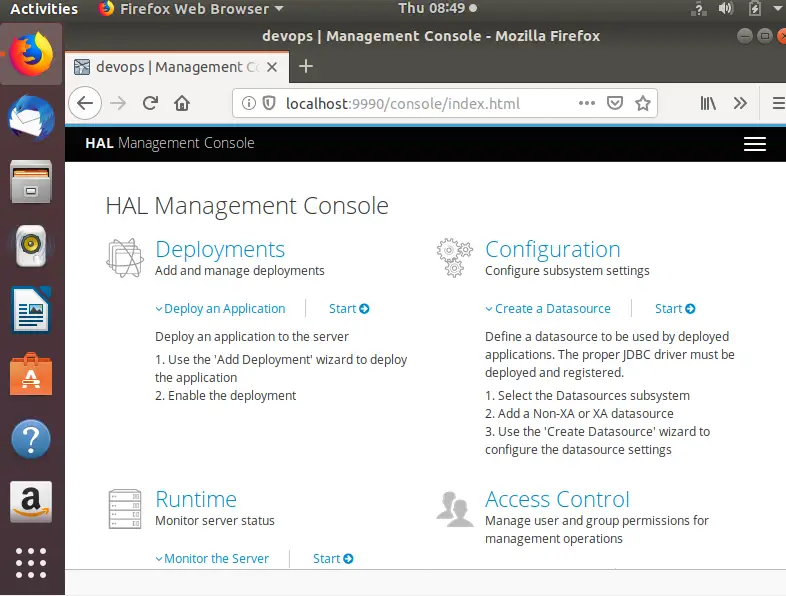
Step7: Accessing WildFly Management Console
If you want to WildFly Management Console, you can open your browser and type the following URL:
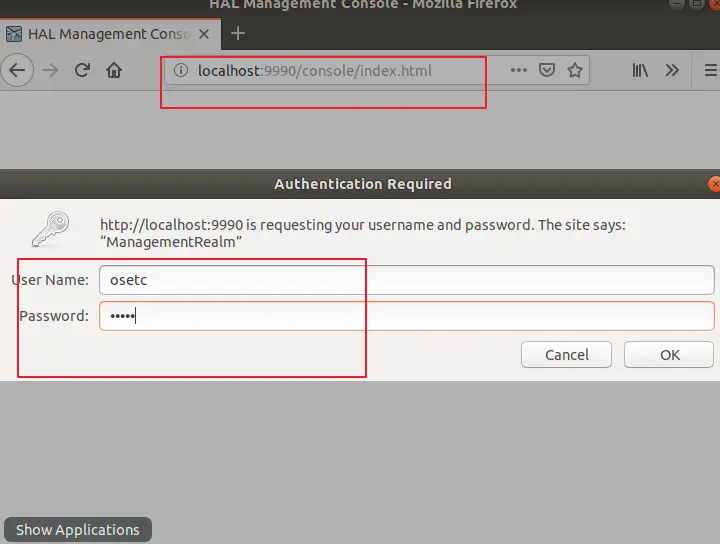
then you need to type the username and password created in the above step for authentication. Then the Winldfly console will be shown.
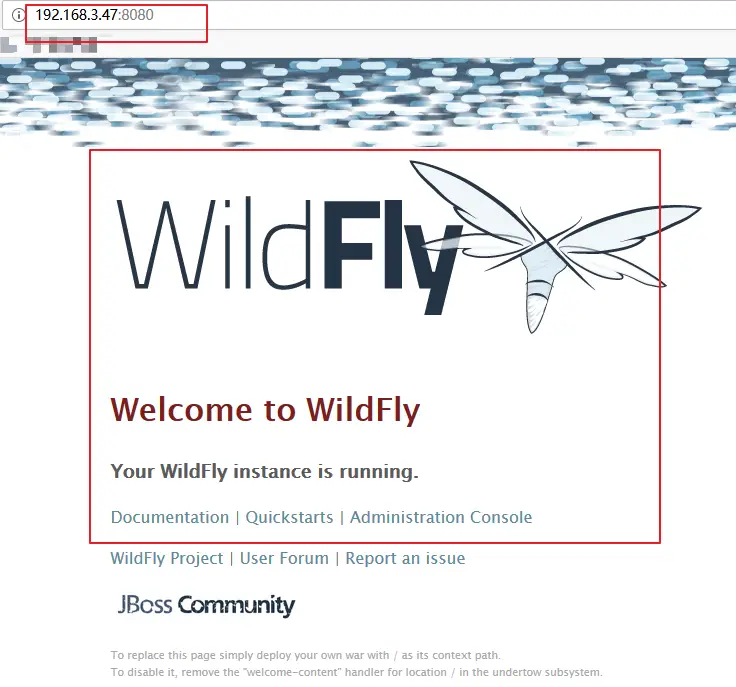
Step8: Accessing WildFly Console
If you want to access the default WildFly web page, just open your web browser and type the below link:
if the WildFly service is running normally, you should see the below screen:
Conclusion
You should know that how to install and configure WildFly(JBoss) Application Server on your Ubuntu or Debian Linux. If you want to see more detailed information about WildFly, you can directly go to its official web site.