How to Configure Network Static IP Address on Ubuntu 16.04 or 18.04
This post will guide you how to configure Network Static IP address on Ubuntu Linux 18.04 or 16.04. How do I change the IP address from the default DHCP mode to Static on Ubuntu system.
- Method1: Configuring Static IP Using DHCP
- Method2: Configuring Static IP Using Netplan
- Method3: Configuring Static Ip Via Command Line
- Method4: Configuring Static IP Using Ubuntu Desktop
![]()
When you installed one Ubuntu system on your machine, the default network setting is to configure your server to get its IP address via DHCP server. And if you want to change your ubuntu server network from DHCP to static settings, or you want to setup a static IP address for your network interface, you can do it by the following methods.
Method1: Configuring Static IP Using DHCP
Normally, Your Ubuntu system will use DHCP server to obtain its networking IP address. And you will get a dynamic IP address. And If you want to get a static IP address, you need to configure you DHCP server to set a static IP address to your system based on its Mac address. Then DHCP server will distribute a static IP address to your machine.
Method2: Configuring Static IP Using Netplan
If you are using Ubuntu 17.10 or above version, you can use a newly network management tools called netplan to configure your network settings on your ubuntu system. Netplan tool will use configuration files with YAML syntax to replace the configuration file /etc/network/interfaces that had previously been used to configure the network on Ubuntu system.
To configure a static IP address on your Ubuntu system, you need to modify a netplan network configuration file located in /etc/netplan/ directory. You need to find the default netplan configuration file called 01-network-manager-all.yaml or others, if the file file does not exist, you can generate the configuration file with the following command:
$ sudo netplan generate
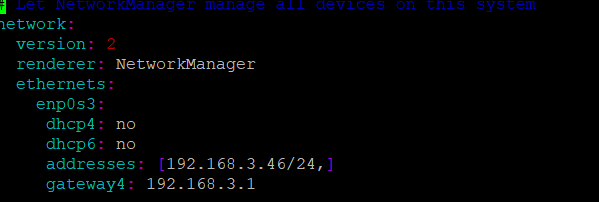
If you want to set your network interface enp0s3 to a static IP address 192.168.3.46 with gateway 192.168.3.1, just modify the default netplan configuration fiile with vim text editor:
$ sudo vim /etc/netplan/01-network-manager-all.yaml
Add the following lines:
ethernets:
    enp0s3:
      dhcp4: no
      dhcp6: no
      addresses: [192.168.3.46/24,]
      gateway4: 192.168.3.1
save and close the file. And run the following command to apply changes:
$ sudo netplan apply
If you hit some error message while running the above command, you can pass –debug option to netplan command for debugging, type:
$ sudo netplan --debug apply
Note: if you want to set dynamic DHCP IP address for your network interface with netplan tool, just changing dhcp4 variable as yes in the default netplan configuration file.
Now you have assigned a static IP address for a network interface on your Ubuntu system.
If you get more information for netplan tool, you can check it man page of netplan with the following command:
$ man netplan
Method3: Configuring Static Ip Via Command Line
You can also change Ubuntu network settings via command line on your Ubuntu system. And this method is mostly used in environments where there is only command line. To change the network settings for a network interface from DHCP mode to Static via command line interface on Ubuntu system, just do the following steps:
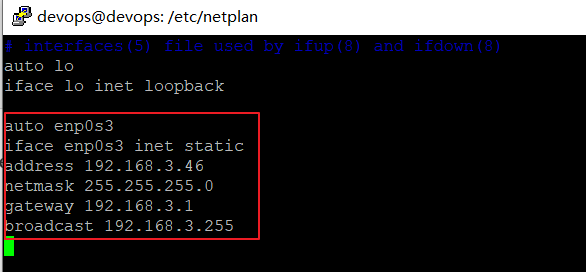
Step1: modify the default network interface configuration file called /etc/network/interfaces with vim text editor:
$ sudo vim /etc/network /interfaces
Step2: appending the following lines for enp0s3 network interface.
auto enp0s3
iface enp0s3 inet static
address 192.168.3.46
netmask 255.255.255.0
gateway 192.168.3.1
broadcast 192.168.3.255
Step3: save and close the above file, then reboot the system.
Step4: once system rebooted, you can check if the ip address is configured with the following command:
$ ifconfig
Or
$ ip addr show dev enp0s3
Outputs:
devops@devops:/etc/netplan$ ip addr show dev enp0s3
2: enp0s3: <BROADCAST,MULTICAST,UP,LOWER_UP> mtu 1500 qdisc fq_codel state UP group default qlen 1000
link/ether 08:00:27:1d:33:d0 brd ff:ff:ff:ff:ff:ff
inet 192.168.3.46/24 brd 192.168.3.255 scope global noprefixroute enp0s3
valid_lft forever preferred_lft forever
inet6 fe80::a00:27ff:fe1d:33d0/64 scope link
valid_lft forever preferred_lft forever

devops@devops:/etc/netplan$ ifconfig
enp0s3: flags=4163<UP,BROADCAST,RUNNING,MULTICAST> mtu 1500
inet 192.168.3.46 netmask 255.255.255.0 broadcast 192.168.3.255
inet6 fe80::a00:27ff:fe1d:33d0 prefixlen 64 scopeid 0x20 ether 08:00:27:1d:33:d0 txqueuelen 1000 (Ethernet)
RX packets 35531 bytes 45038695 (45.0 MB)
RX errors 0 dropped 0 overruns 0 frame 0
TX packets 16291 bytes 1546837 (1.5 MB)
TX errors 0 dropped 0 overruns 0 carrier 0 collisions 0
Method4: Configuring Static IP Using Ubuntu Desktop
You can also setup static IP address for a network interface using Ubuntu desktop. Just do the following steps:
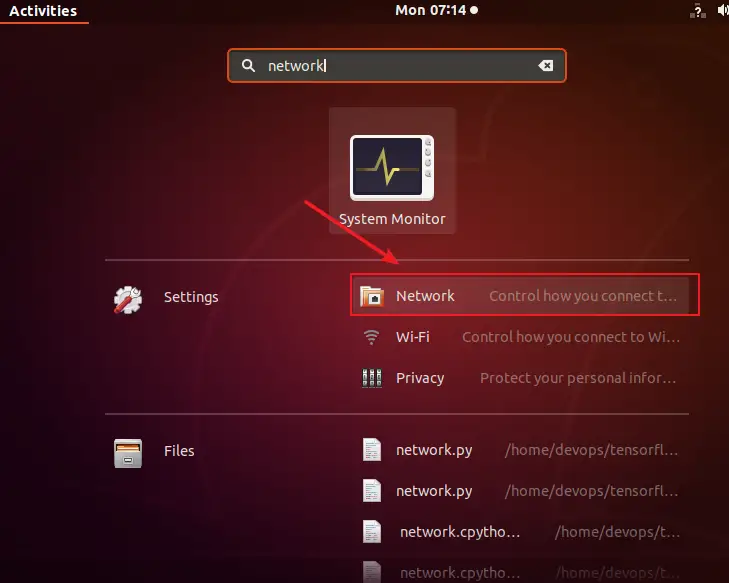
Step1: search for “network” in the Activities screen, and then click on Network icon.
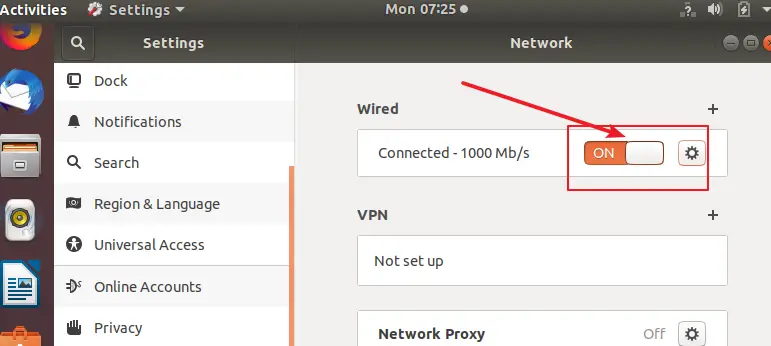
Step2: click on the gear box icon next to your network connection that you want to configure.

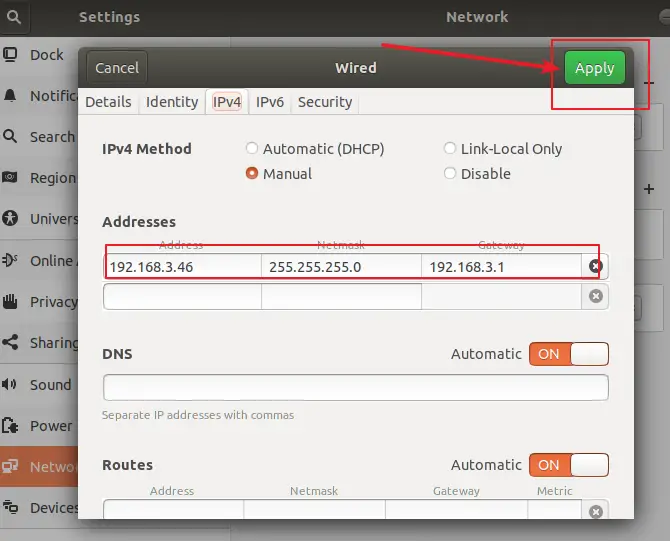
Step3: click IPv4 tab, then choose Manual option, enter your static IP address, Netmask, Gateway. Then click Apply button .
Step4: restart you network by click ON/OFF switch.